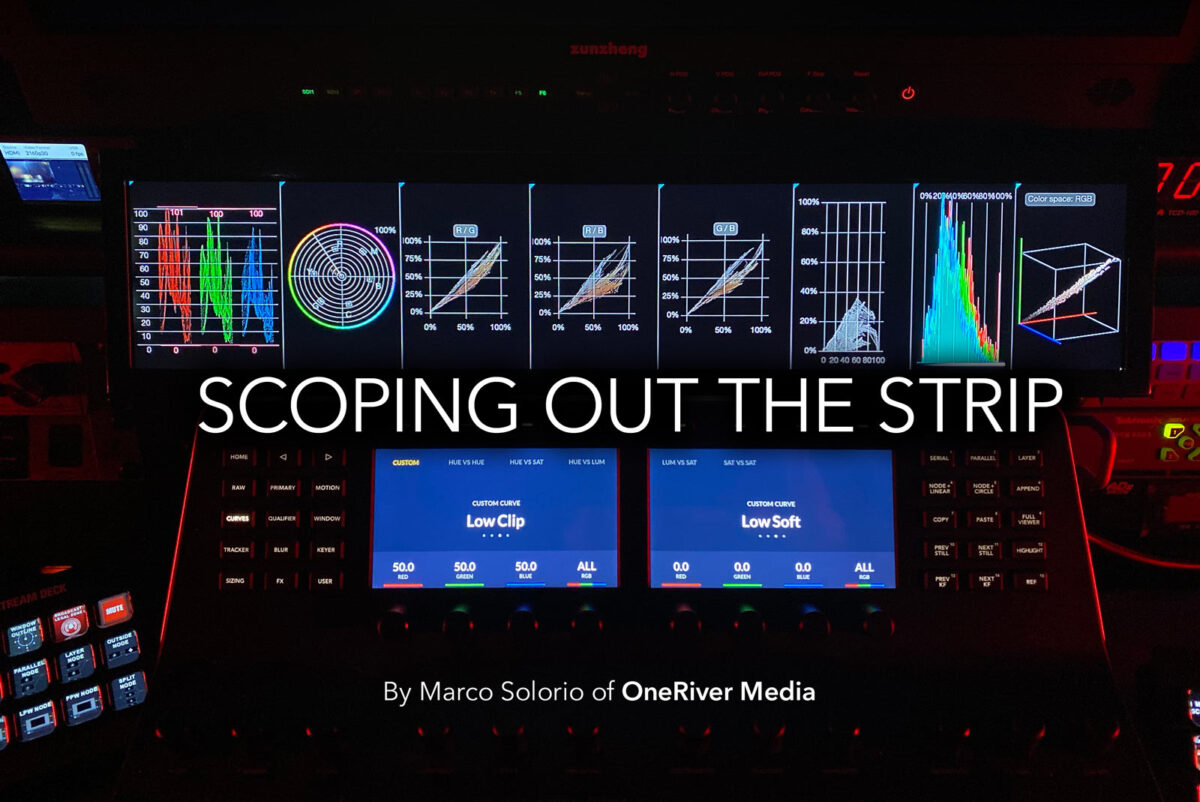
Marco Solorio of OneRiver Media builds a waveform vectorscope solution based on a single-screen “LCD strip” with Stream Deck interactivity to switch between various scope layouts. The results are better than expected.
I’m going to cut to the chase: Here is the link to the LCD strip panel I rolled the dice on and tested. It seems to work well after a bit of trial and error over the past few days. This wasn’t a plug-and-play solution for me, but if you continue reading this article, it will be plug-and-play for you, along with several other bits and pieces that can assist in making the experience a better one.
The Background
I started using Tektronix CRT-based waveform vectorscopes back in the 90’s that were somewhat similar in physical size to this LCD strip panel. I always liked this size because it has the ability to sit under your color reference monitor and above your control surface/keyboard system in direct line-of-sight.When rasterizing scopes came into the scene in the 90’s/00’s, I used dedicated full-size screens to view their scope output (at the time, 4×3 LCD panels, then later 16×9 and 16×10 panels). These included rasterizers from Tektronix and Magni, and then computer-based solutions including Blackmagic Design UltraScope, Divergent Media ScopeBox, and now Time In Pixels Nobe OmniScope. One of the advantages of that particular setup was the full-size screen allowed for extensive zoom-in control (something that can still be done if you keep reading).
The Display
This LCD strip display is obviously the focus of this setup. This display came directly from China via DHL (with not so-great-packaging that took a while to ship) but so far the unit has worked well, despite the lack of manuals. This particular display is an “advertising bar display” with a resolution of 1920×360. It has built-in playback support for connecting USB thumb drives to loop images, video, and audio (with internal speakers) for in-store marketing purposes. Obviously we’re not using it for that and I was reluctant in using this display for fear that quality and refresh rates would be lacking. My other concern was that the vertical resolution would be too small to have quality visual output, but I’ve had no issues with the output quality considering this will only be displaying scope UI.I had originally looked at higher resolution displays, but they had some red flags that I wanted to avoid. For one, I didn’t want the display to lag in responsiveness and if the layout has too many scopes at once at high resolution (something I’ve experienced in the past). This partially depends on the computer driving the display but knowing this was connecting to my 2014 Mac Mini, I didn’t want to push the internal GPU too hard to insure smooth output. At 1920×360 resolution, a full array of scopes running together has been buttery smooth. Some of these high-resolution displays are also too tall and too narrow for my taste; this 19-inch LCD display fits the bill perfectly for my taste.
And keep this in mind: while 360 may seem like a low vertical resolution, it’s nothing different than 1920×1080 displays you’ve used for years, where in this case, you’re using just 360 of those 1080 pixels. In other words, you’re not decreasing pixel resolution compared to 1080 displays you’ve used before.
Oh and I almost bought a “three-up” display long ago, but I didn’t want to have to see two inner bezels/buttons between the three displays (where LCD real estate could otherwise be). Plus I didn’t want to deal with the hassle of sending out one HDMI output and split into three using another device [AMZ|B&H]. A single strip display avoids all of that, reduces cost, and produces a much cleaner, full-featured look in my opinion.
Tip: If you order this particular display, I’d highly suggest ordering CR2025 batteries if you don’t already have any. The remote doesn’t come with one and the remote is required to make this all work. More on that in a bit.
The Software
As mentioned, I’ve used other scope solutions over the years. So far I’m enjoying how Time In Pixels Nobe OmniScope is performing. Some of the other solutions I’ve used sort of lacked in customization or connectivity to the Elgato Stream Deck [AMZ|B&H] (more on that in a bit). With OmniScope, I can create custom layouts with custom scope settings with no performance hits using my Mac Mini. While OmniScope is not perfect and I could see the software maturing a little more, so far I’m quite pleased with it and prefer it over any other solution I’ve used.The Mac Mini
My 2014 Mac Mini (2.6GHz Intel Core i5, 8GB RAM, 1.5GB Intel Iris GPU, OS X Mojave) has been used as the driving horsepower on previously similar solutions and luckily I didn’t need to upgrade or add anything to make it work for this as well. A lower specked Mac Mini might work but I haven’t tested that.Video Capture
I’m using the older Thunderbolt Blackmagic Design UltraStudio Mini Recorder as the SDI capture device into the Mac Mini and works like a charm with OmniScope (older Thunderbolt 1 model I’m using [AMZ|B&H] and current Thunderbolt 3 model [AMZ|B&H]). Install the latest Blackmagic Drivers and the input option is right there for OmniScope to use.Multi-monitor Connectivity
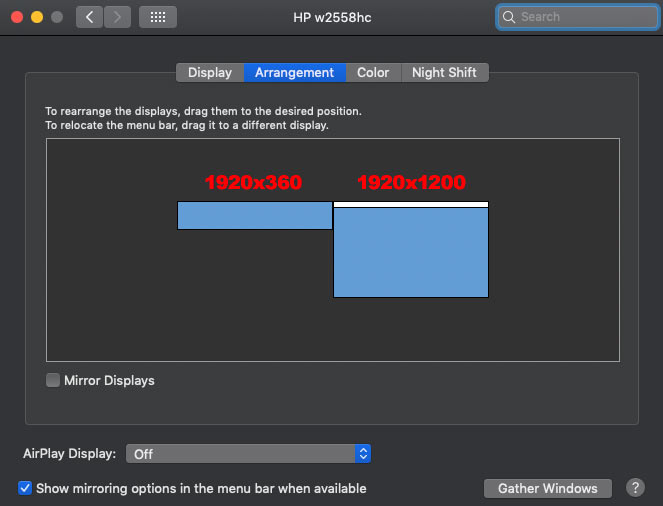
This isn’t required but it sure does raise the bar for both operability and ease of use. With the Mac Mini and the addition of a Thunderbolt to HDMI adapter [AMZ|B&H], it allowed me to connect the 19” LCD Strip and a full-size 27” LCD display. There’s a lot of software tweaking (more on that in a bit) and having to set that up on a 1920×360 display would be torture.Having the additional full-size display is also beneficial for extended zoom-in scoping. In my case, I have the full size scope display off to the far right side of my main monitor setup (something I’ve done for many years now). The 19” LCD strip has my main scope layouts and the full-size display mostly uses solo’ed waveform or vectorscope readouts.
Again, this isn’t required, but if you have the space and budget, it can be extremely useful for both setup and operability.
Buttons Galore
The Elgato Stream Deck is a major puzzle piece to making this all work the way I envisioned and OmniScope has its own integration into Stream Deck for added flexibility. I think you can connect to Stream Deck without the OmniScope connectivity plugin but doing so would only allow you 9 layouts versus the ability to use unlimited layouts and all the buttons on both the standard Stream Deck [AMZ|B&H] and the larger StreamDeck XL [AMZ|B&H]. And while the OmniScope utilizes its own connectivity plugin into the Steam Deck, it still maintains the ability to mix buttons on the Stream Deck to include both OmniScope functions and standard Stream Deck assigned button controls. This is powerful.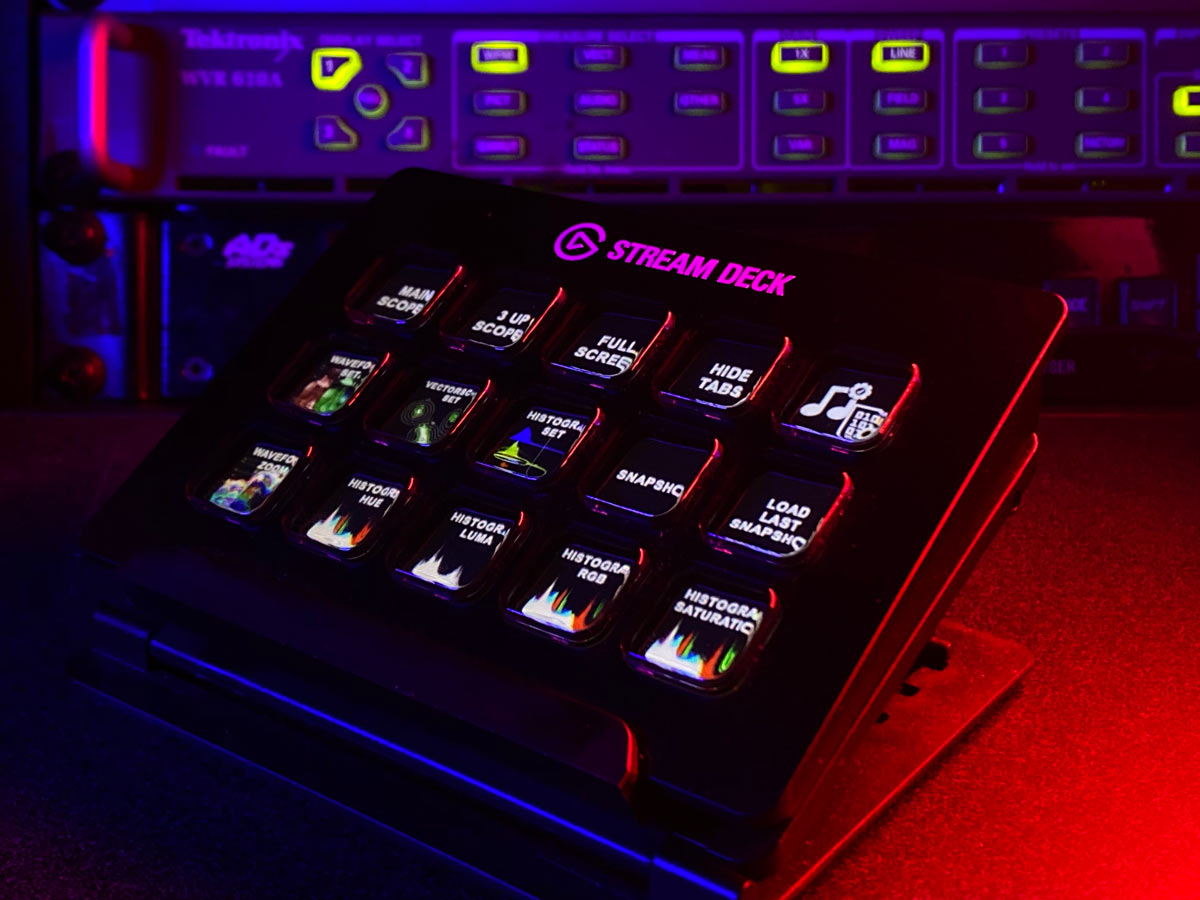
The Hook Up
OK, I literally almost threw in the towel and sent this 19” strip display back to China because I initially thought it just wasn’t going to work. So follow these directions carefully to get your display working.Make sure you have the latest drivers/firmware for your video capture device.
Install the latest update to OmniScope or whichever scope software of your choice.
Make sure all your SDI cables, HDMI cables, and OmniScope setup is all working together correctly.
The packaging for the 19” LCD Strip is hand cut and a bit “home brew”. The remote was sandwiched in-between the Styrofoam and I didn’t catch that at first (I didn’t even initially realize there WAS a remote). If you simply turn on the display and give it a working HDMI feed, it will merely say “No Device” with a blue screen. There is no HDMI signal auto-sensing to switch it. The display is originally to be used with a USB thumb drive as an advertising screen, so by default, it’s displaying what should be driven by a USB thumb drive. Install a CR2025 battery (not supplied, so buy one) in the remote. Hit the Menu button on the remote, go to “Preference”, then “Input Source”, and change it from “USB” to “HDMI”. Took me a while to figure this out since I didn’t originally find the remote in the box and thought the display was screwed up. But once HDMI is selected, the display will finally give you monitor output… sort of.

Next important part: By default, the OS X monitor settings will not allow you to switch to the display’s native 1920×360 resolution and instead only has options for “Default for display” (it’s not native nor the default) and “scaled” for 1080p, 1080i, and 720p options. None of these settings will work in what appears as the only options to choose from. This was the other catch that I couldn’t initially figured out and the display outputted either a heavily sheared unreadable image or an extremely vertically squished output that turned the Vectorscopes into flattened egg shapes.
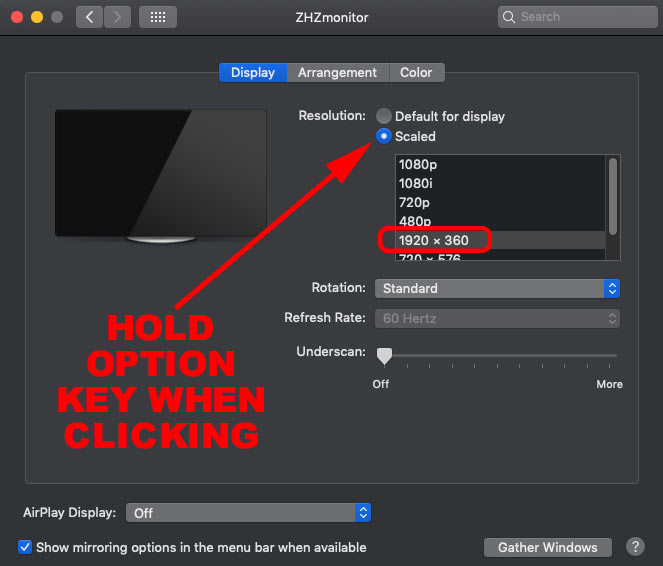
After some Googling around, I learned that you MUST hold down the Option key when you click the “Scaled” button, and hot damn, there appears the native 1920×360 display option. Boom, now we’re in business!
Geek note: You cannot run OmniScope (on one display) and ScopeBox (on a second display) at the same time from the same computer. Once the first application locks into the UltraMini Recorder, the next launched application will not receive the same video signal. For this reason, I’d love to see OmniScope add multi-monitor support. For now, I can use any of my other outboard scopes (Tektronix, UltraScope, etc.) on that second full-size display for waveform or vectorscope pixel-peep zooming.
Performance
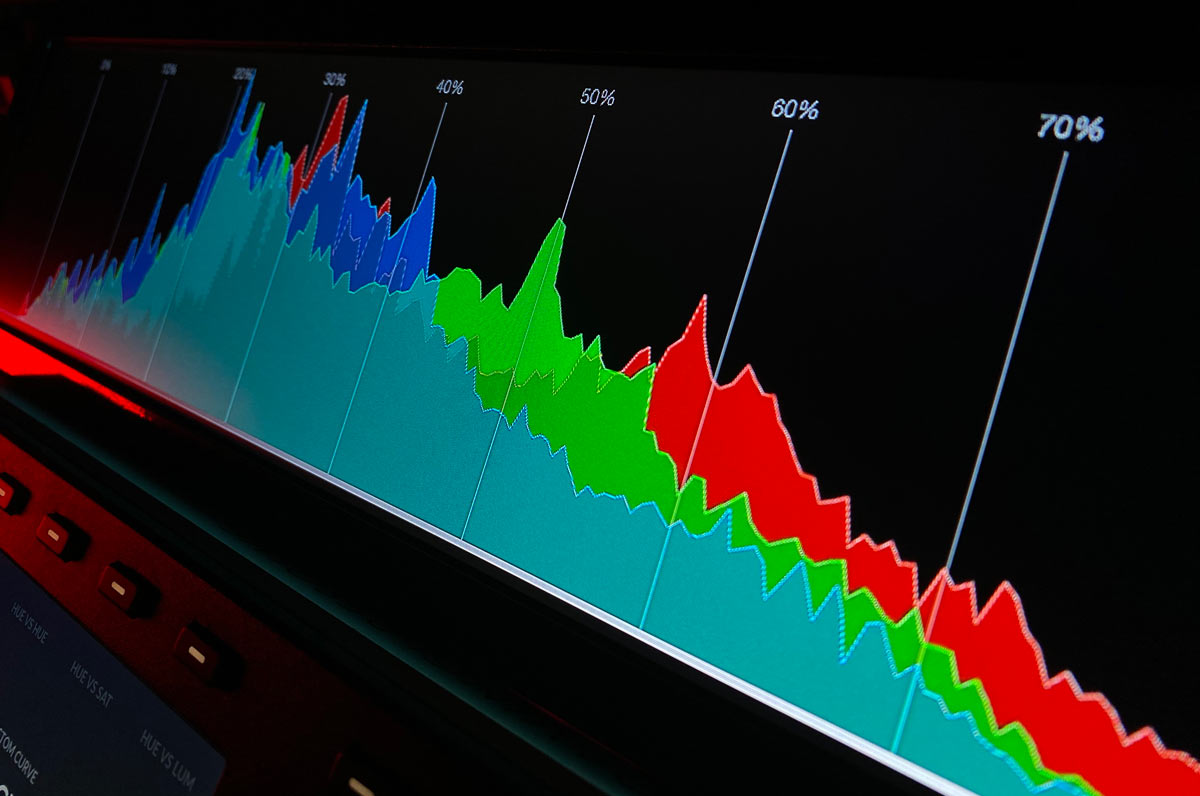
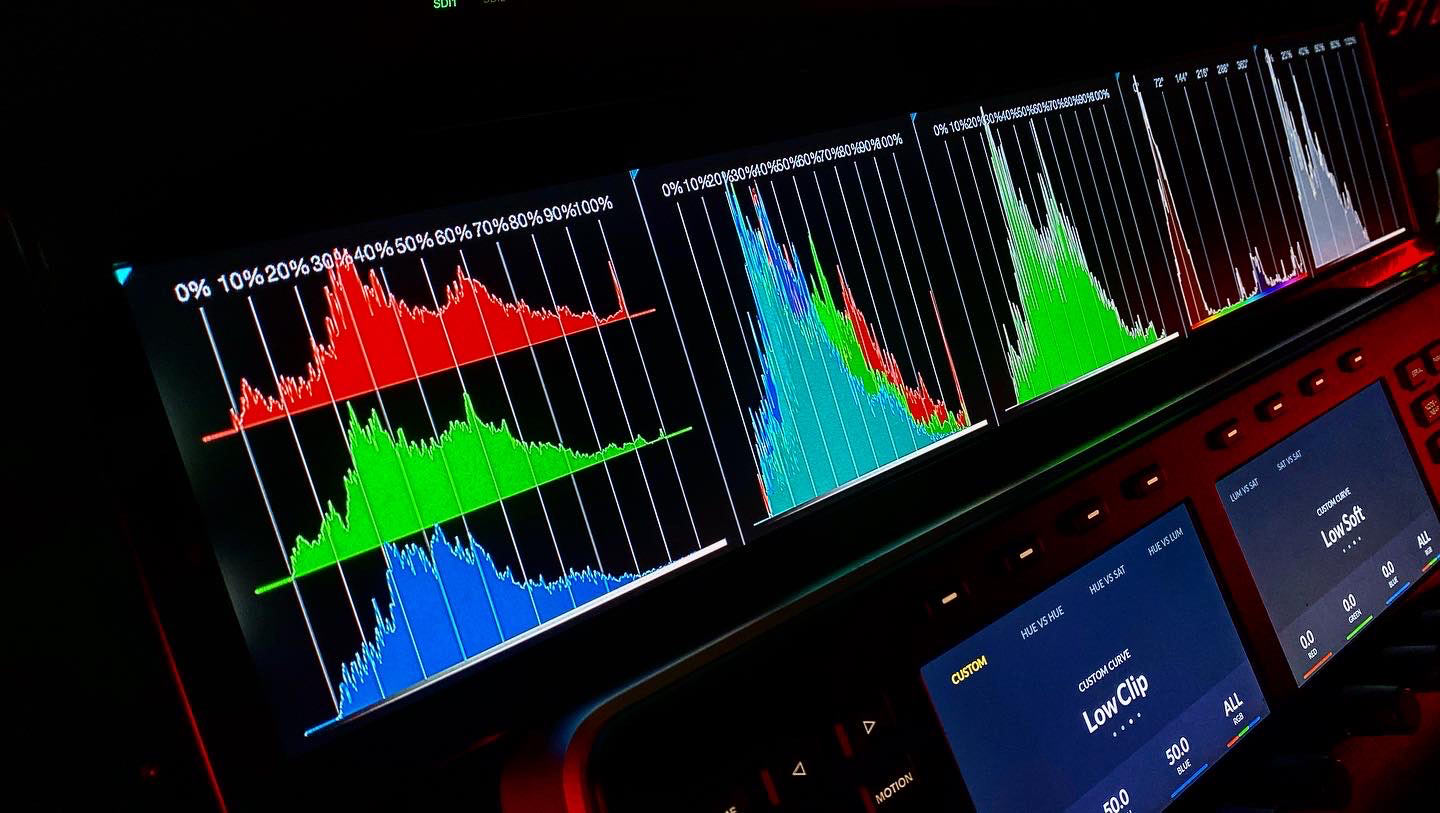
There are a few frames of delay from display, but I think this has more to do with OmniScope since a direct video feed has much lower lag time. But so far it hasn’t been a huge issue (again, we’re talking a few frames on scope readouts). Angle of view is ok and brightness is quote good. The display has internal settings and I’ve changed a few: turned the sharpness down to zero, increased the contrast a bit and bumped up the backlight one notch (my taste in these settings may change later on, but sharpness set to zero is highly advised). Again, we’re looking at scopes, lines, bars, graphs, etc., not the graded image, so I’m not too concerned with image performance, other than refresh rate, which has been good. I’m actually quite impressed with the contrast and brightness of the display, so much so, you might not want it maxed out if your color suite is dark when grading (or the display might be distractingly bright).The Bottom Line
All in all I’m very pleased with this setup. I’m glad I kept digging deeper to solve a couple of those initial issues and didn’t return the display back to China. The build quality of the display is actually pretty good with a full metal chassis, despite it lacking a manual, a battery for the (hidden) remote, and homemade Styrofoam packaging. After years of wanting this exact interactive stripe-screen scope setup, I’m glad it’s finally here. I’m sure there will be a better solution in the future, even a completely self-contained unit (with internal processing, a built in OmniScope style software solution, GPU driver, etc., eliminating the need for a Mac Mini, video input device, et al), but until then, I’ll be using the heck out of this setup.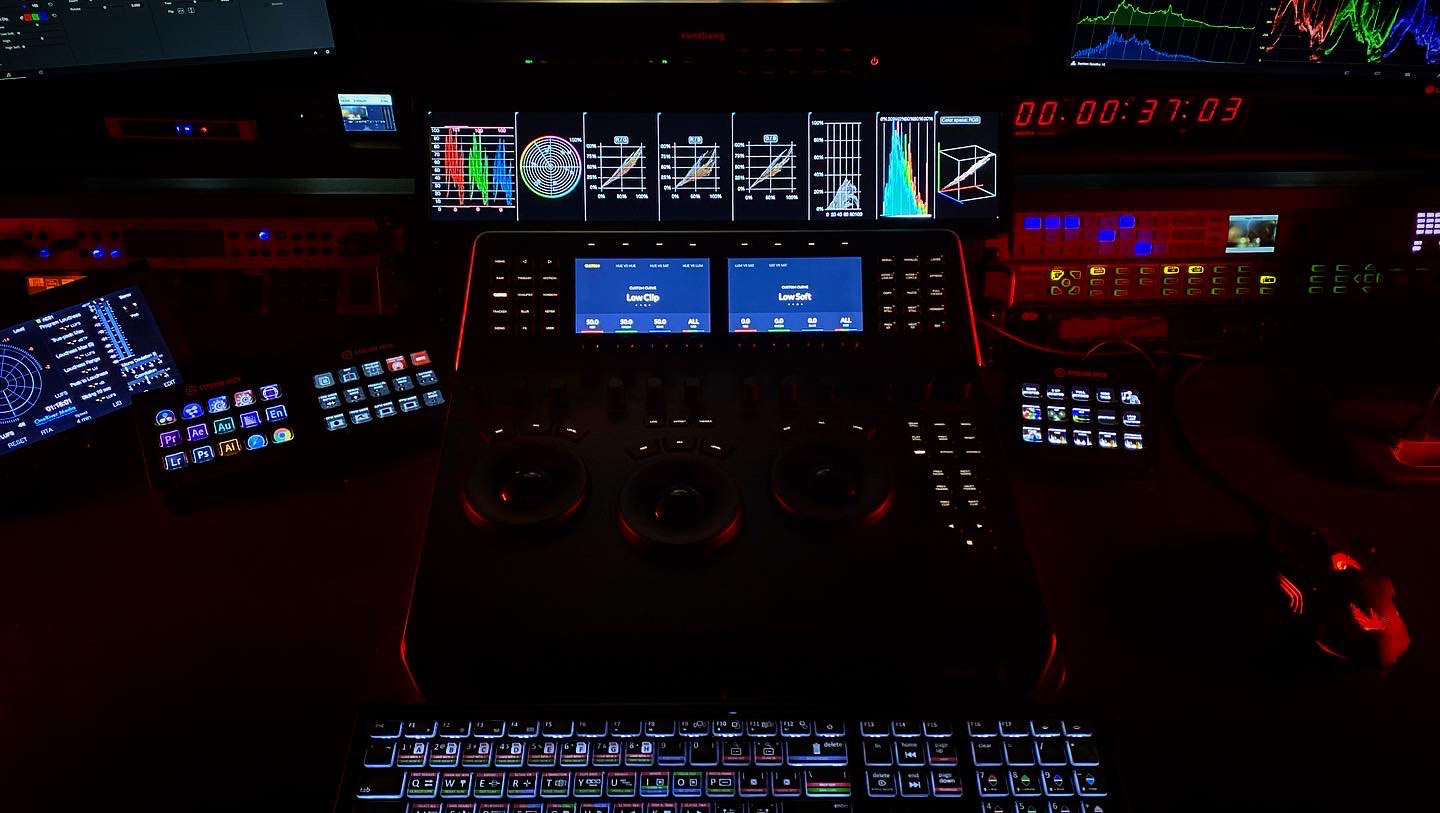
Share this post
About the Author
Article © OneRiver Media, including applicable photographs. All rights reserved. Article and its contents shall not be copied or reprinted without the expressed written approval of OneRiver Media.
FCC Disclaimer - Links from this article might go to affiliate links to B&H and/or Amazon (not much different than the ads you see in YouTube ads, but more focused). Visiting these links (or buying products from the links) cost you nothing additional and may in turn help us pay for the cost of hosting these free articles we write. These articles take an enormous amount of time (in most cases, weeks and months) to research, draft, write, edit, rewrite, and shoot custom photography/video for. In no way do these affiliate links cover the cost of all of that, so any help these links can provide is a huge help to us to continue to offer free content to our readers.