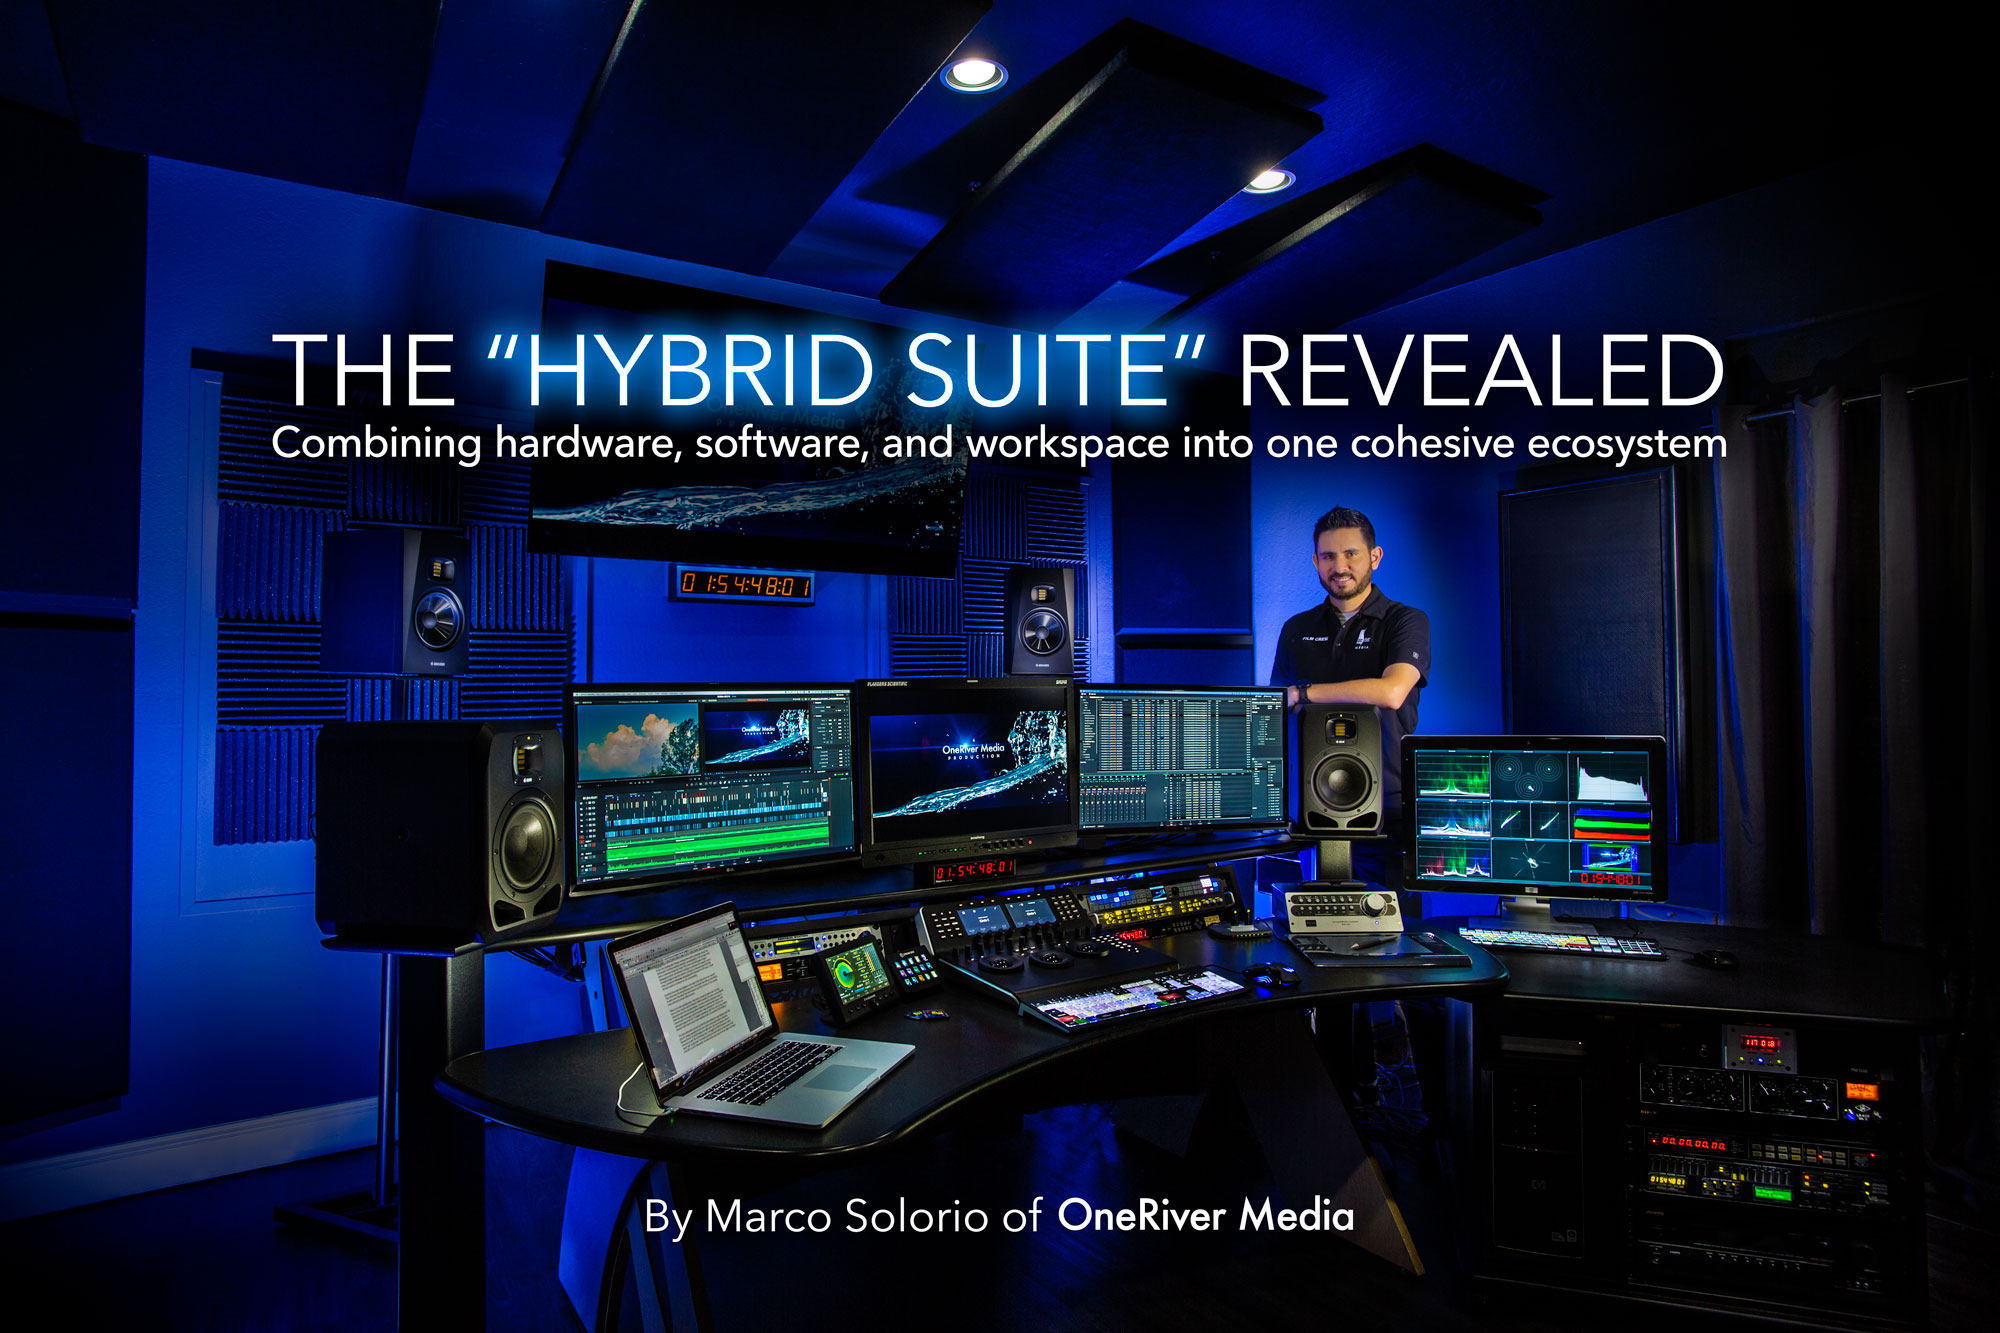
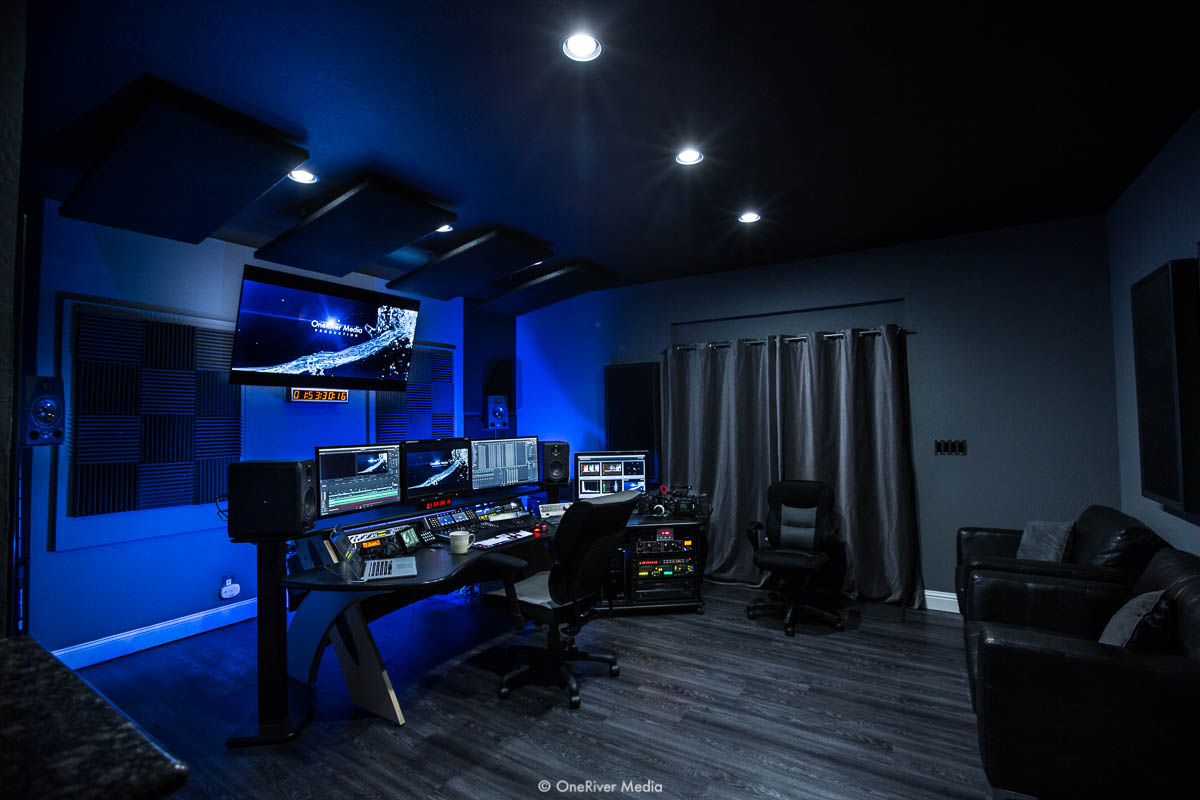
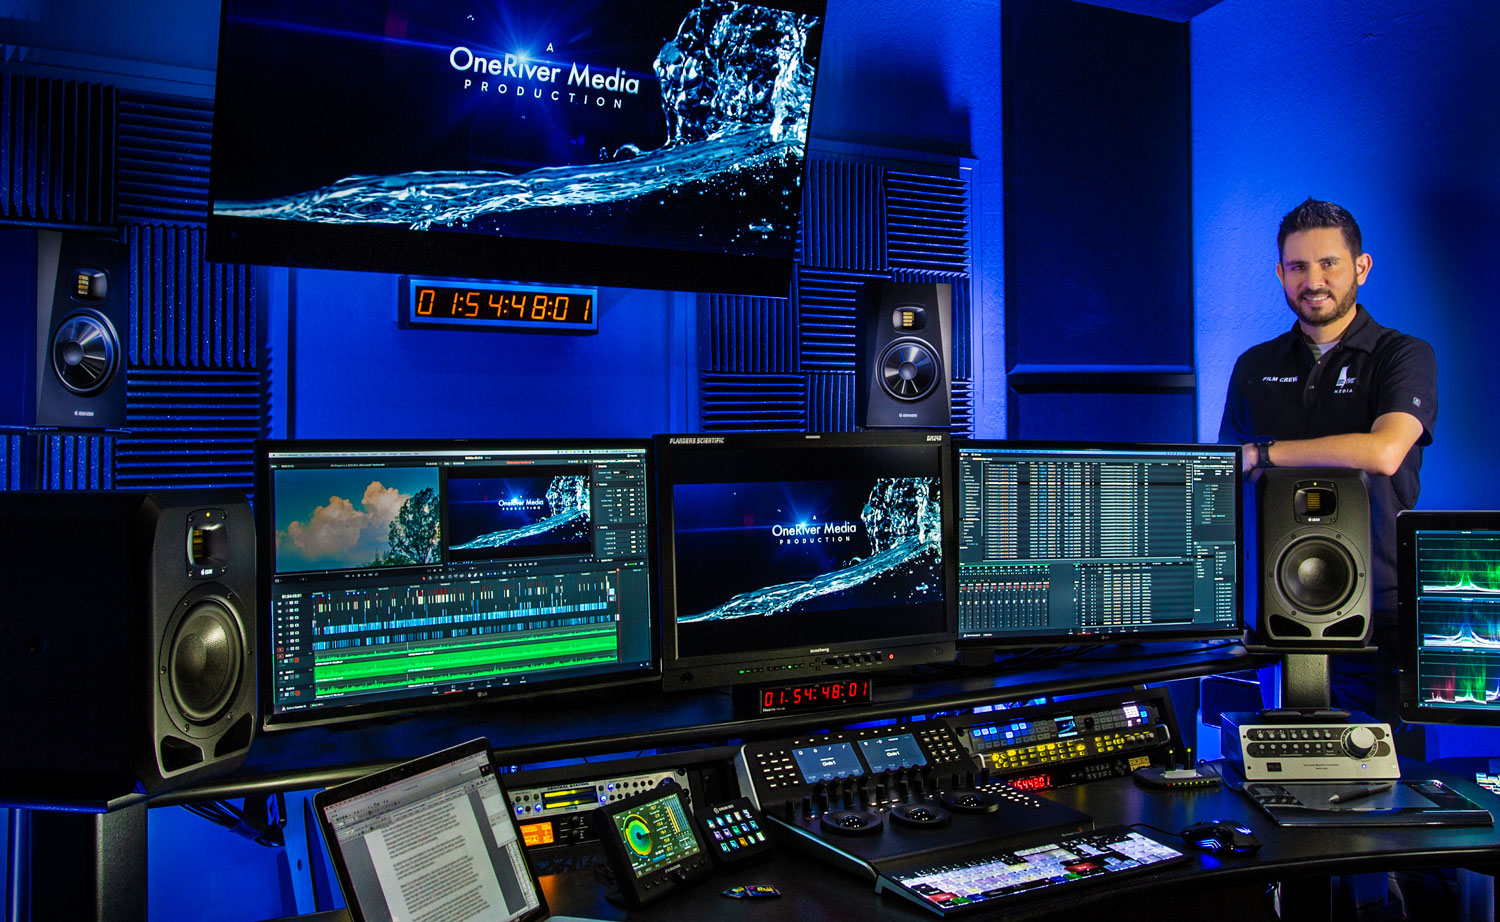
Marco Solorio of OneRiver Media takes us into his newly built suite, which he refers to as the “hybrid suite”, combing editorial, color grading, and audio mixing in one harmonious environment. Installation affordability is this suite’s undertone where today’s industries are in tight financial climates. With increasing demand for clients wanting “all-in-one” services, building such a suite has proven more important today than ever before. Tips on building your own workspace bookends this in-depth article.
One of the things I love about working in this industry are the work environments we perform our magic in. Like the computers and equipment that have evolved in the decades, so too have the spaces we work in… for the most part.
My first “work room” was my bedroom growing up as a child in my parents’ house. My bedroom housed a bed, a desk, an archaic home computer by today’s standards, and some basic MIDI gear for making music. While working part time and going to school, I eventually bought a Tascam 48-input 8-buss mixing console (24 channels dual inline) to better develop my audio recording and mixing skills, even if not in an ideal work space. It’s a far cry from where and how I work today, but the foundation was laid and I never looked back.
In the early 1990’s, I went from seasoned hobbyist to budding professional, getting my start in the industry. As I evolved, so did my main work environments. Through the decades, I’ve gone through all aspects of the spectrum, from IKEA furnished bedrooms to custom-built multi-desk facility infrastructures.

Primary Objective: Comfort
All my clients have very different needs for their projects, so I might sit in the suite from 5 minutes in a day or 16 hours in a day, depending on load and deadlines. If I’m sitting in a room for at least 8 hours in a day, you’re damn well sure I want to be in an environment that is comfortable, relaxing, and calming. Likewise, I want a room that excites me, especially if I’m sitting in it day in and day out. To me, it’s worth the investment to make a room that makes me feel invigorated.Let The Sparks Fly
My suite needs to also spark creativity, not take away from it. The last thing I want is an environment that causes me to have excuses on why I can’t work efficiently and creatively.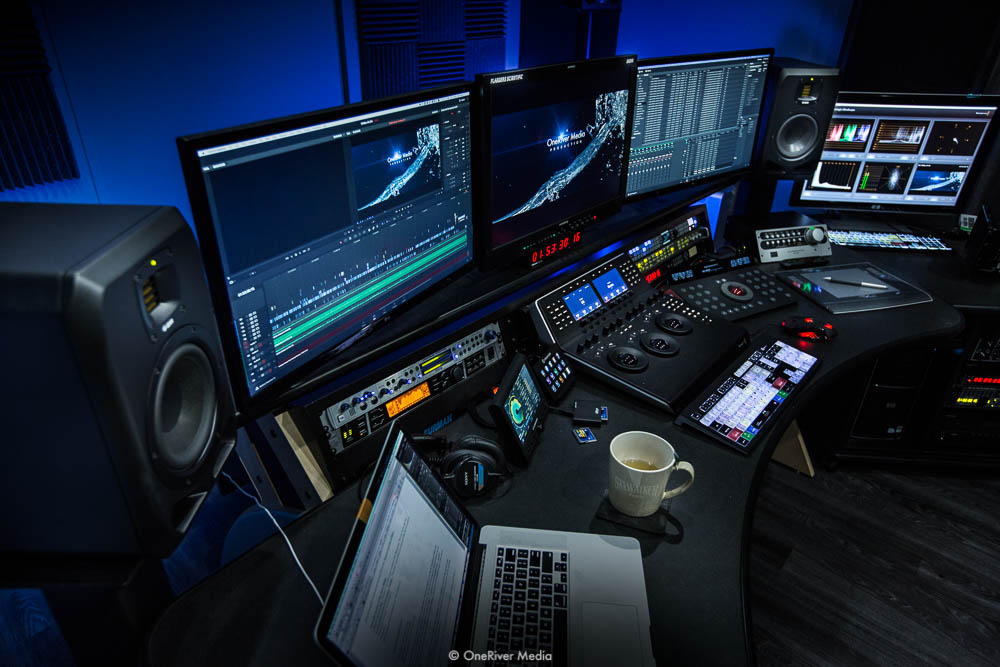
Being with something so intimate for so many hours in the day requires some ergonomic love.
Controlled Environment
Once my primary objectives of comfort, excitement, and creative mojo are laid as foundation in the premise of the suite, the next thing I do is figure out how I can make all that work within two base factors: a controlled environment for the work that will be done in it and the key components of the type of work that will be performed in it.
When building the new hybrid suite, it was imperative to me that there would be a controlled balance for both visuals and sound. This proved tricky because controlling sound means you’ll be dealing with redirecting sound, which then means you may have a combination of angled walls, diffusors, absorbers, and a multitude of other physical surface modifiers… all of which may cover the visual neutrality of a color grading room. As mentioned, there are compromises in building such a hybrid suite and this example is the biggest of them all.
But let me step back just a tiny bit. The first order of a controlled room is its shape. The hybrid suite is based on a square-ish shape, which is fine as either an edit suite or color suite, but not so great as an audio suite. Likewise, this room cannot be floated (essentially a room within a room, which is a common practice in audio control rooms, as discussed in this article later) nor can the room be re-shaped. Because of these two factors, I needed to instill some workarounds to make the sound in the room as best as it could be within the confines I mentioned. Ultimately, the design and modifications worked out (details on this in a bit).
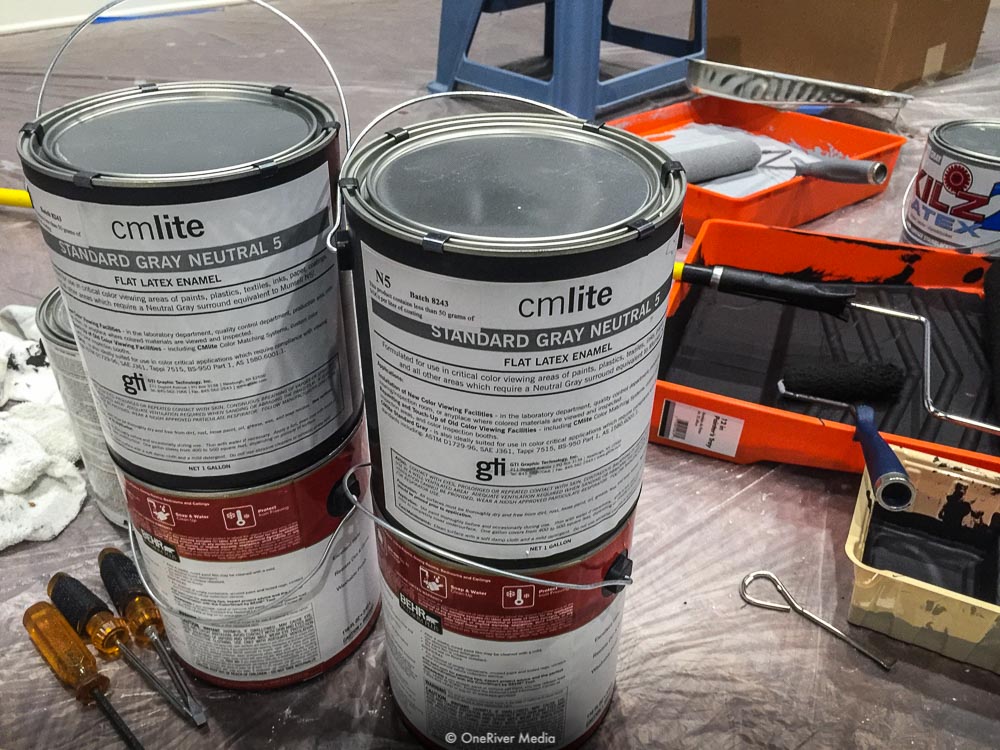
The next order of my controlled hybrid room is its color. I wanted to have the absolutely most neutral grayscale room as possible. While some people may feel this as a boring look, I actually feel it gives the space a high-end, modern look and feel, which is something I like. But not just any gray, but color grade specific neutral gray. I used CMLite N5 paint by GTI Graphic Technology, Inc., something I originally learned about from my good friend (and colorist), Patrick Inhofer. While Patrick uses the lighter N6 and N7 darkness level in his suite, I opted for the darker N5 level, which is a darkness level I’ve always preferred in my previous suites. Choosing N5 was further recommended to me by my other good friend, Bram Desmit, the top banana at Flanders Scientific, Inc., where they also built a matrix to mix your own Behr paint as a low-cost alternative solution. While a gallon of professional CMLite N5 paint isn’t cheap (about $110 per gallon + S&H), I only needed two gallons for one room and to me, the cost was well worth it. It’s totally flat and a perfect gray with no color bias or influence at all.
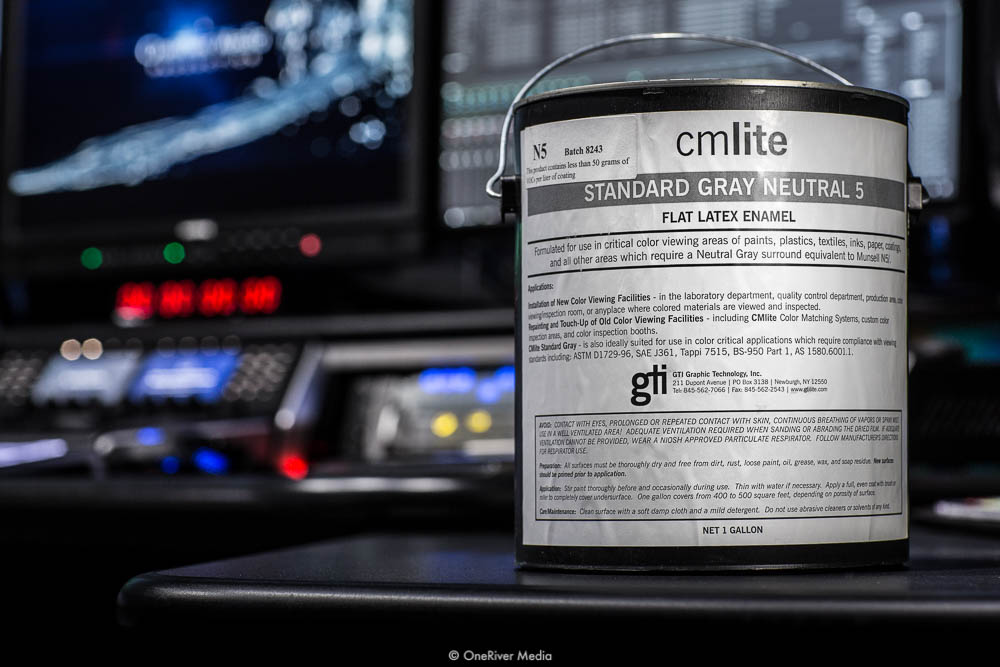
A perfect level of matte gray on the walls with no color bias or influence was a top priority in the build-out of the hybrid suite using CMLite N5 paint by Graphic Technology, Inc.
The hard surface floor in the hybrid suite is the most neutral gray scale I could find without a lean to brown or blue (something I found ended up being common in flooring options). Ironically enough, after going to many flooring shops in person, the color I liked the best came from Home Depot of all places. While the flooring material is a bit thin for my tastes, the flooring itself sits on (A) concrete, then (B) a subfloor, then (C) moisture protection. This was the first time I ever installed flooring myself (a very good cost-cutting measure and it wasn’t too difficult, thanks to some help from YouTube), but was time consuming as a first-timer. In the end it all worked out and the floor’s grayscale neutrality is truly fantastic.
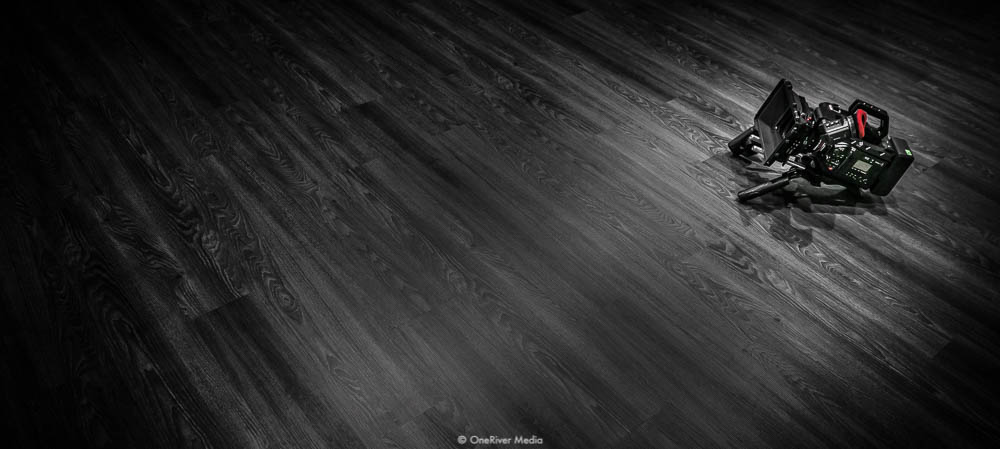
The perfectly monochromatic hardwood flooring in the hybrid suite also makes for nice product photography opportunities!
Another color decision: I painted the ceiling deep flat black, which is something I wanted as more of an aesthetic choice, than any real performance choice (although it does reinforce the choice of a neutral colored room environment). Truth be told, I’ve always loved black ceilings but never had one… until now, and I absolutely love it.
Even my edit desk, which is a TBC X-K3, has neutral gray color on it. I’ve used countless edit desks over the years, from IKEA to custom built from scratch, and TBC desks are still my favorite. I wrote an article about this very desk roughly 13 years ago on Creative COW and my thoughts still hold true for this desk to this day: best in class, bar none.
A word about lighting: The goal is to use lighting at 6500K with at least a CRI of 95 for a pure white output with no green or magenta shift. In LED form, this has proven difficult over the last couple years. I’ve gone through a gamut of lighting manufacturers and so far, the solution I like the best is the Waveform NorthLux 95 CRI 6500K BR30 LED Bulb. While the smaller E26/A19 are available on Amazon, the listing says they’re non-dimmable, whereas the larger BR30 bulbs on the official Waveform website do say they’re dimmable. I bought the dimmable BR30s direct from Waveformand, which was a critical feature I required in the bulb. In terms of audible “buzz” from these bulbs, they’re almost perfectly quiet: at full dim (least brightest), they’re totally quiet and anything above that (to full brightness) there is a very, very subtle buzz — it’s basically inaudible unless you’re in a totally silent room and you put your ear to it. Amidst my continued search for an accurate color suite bulb, I got a lead on these Waveform bulbs via @danlearns on Instagram from a post I had made on my feed, so big thanks to Dan on that.
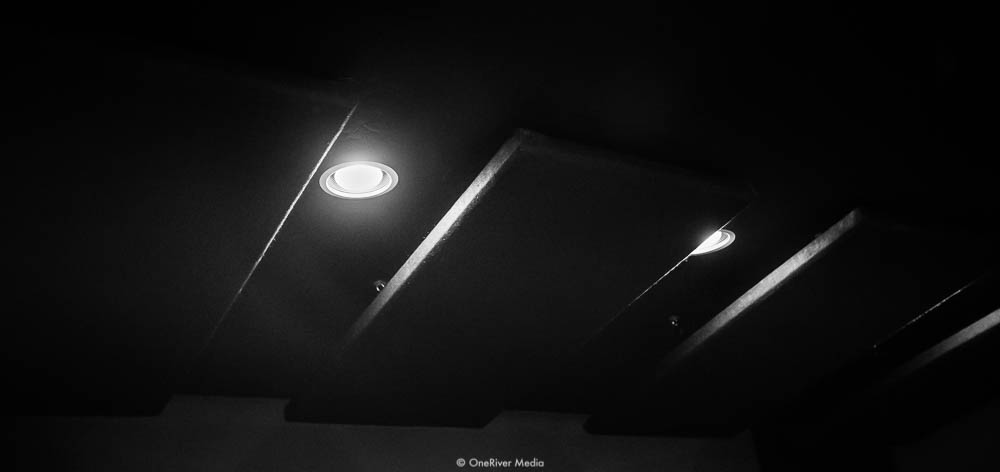
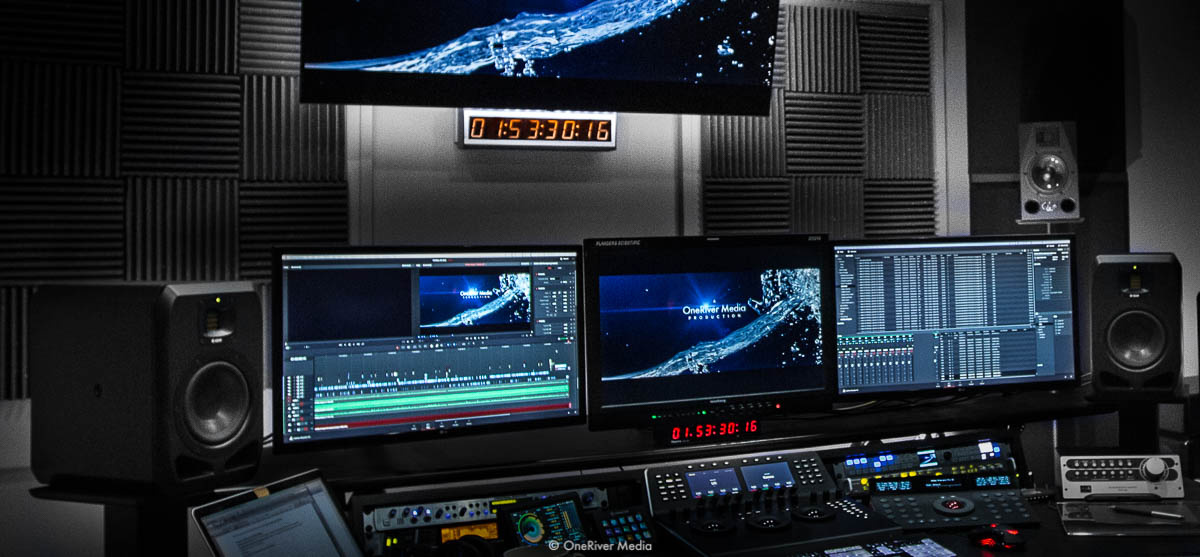
I installed the acoustic panels on the ceiling by hanging them at a slight angle (to help drive the sound waves rearward). The 6500K/95CRI LED ceiling lighting sits between the panels.
But accurate lighting doesn’t stop there. Behind my 65-inch LG C7P OLED UHD HDR client display (B&H | Amazon) sits a 6500K Bias Light Quad (B&H | Amazon) made by MediaLight. These are THE BOMB. Pure 6500K at 93 CRI. They’re even coming out with a new line that even tops that: 6500K at 98 CRI. Crazy! During NAB this year, I had a chance to catch up with Jason Rosenfeld, owner of MediaLight, and genius-level bias lighting master (seriously, he is) and his passion for bias lighting (and lighting technology in general) truly shines through the product. Oh and I’d be sorely remiss if I didn’t mention Juan Salvo (Colorist and longtime friend) pushing me years ago to add bias lighting to my previous suites. At any rate, these lights are truly amazing and help with the overall viewing quality in the hybrid suite. The pure white light against the perfect N5 paint is on a total “eyegasm” level.
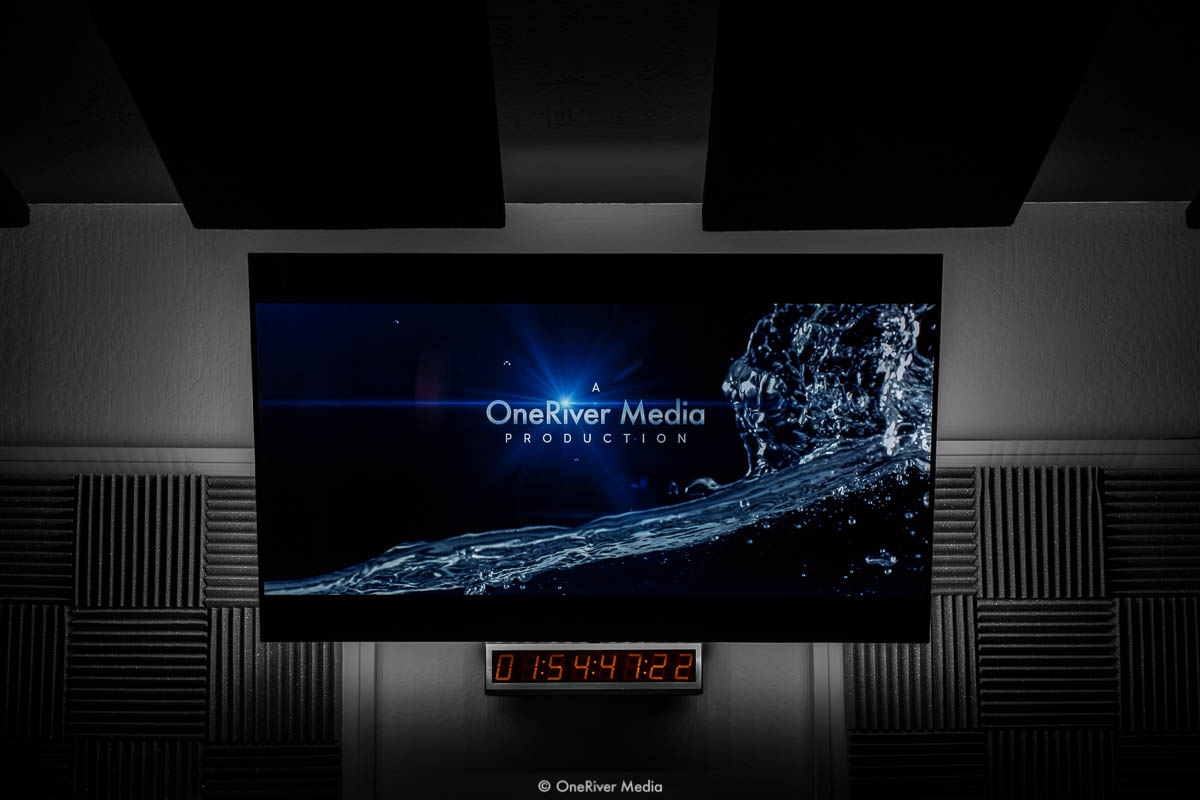
The dimmable MediaLight 6500K 93CRI bias light sits behind the LG C7P 65″ OLED UHD HDR monitor (B&H | Amazon). The ESE timecode display (B&H | Amazon) underneath the monitor can be turned off remotely at any point.
Okay, so the hybrid suite is basically one big grayscale chart. It’s kind of strange being in it for the first time and feeling like you’re sitting in a black-and-white photo (when the 6500K color-grade lighting is on). I’m sure some people will assume that this would be weird but honestly to me it’s the coolest thing to work this way. When I’m color grading (or even editing), having absolutely no surrounding color influence around me is amazing. I feel like when I’m watching the video monitors that I’m truly being soaked into the monitors, rather than the monitors being part of a big distracting space.
One of the above-mentioned compromises is that my acoustic panels, diffusors, absorbers, etc., are not the same gray as the walls. Some are black and some are darker gray. I knew this before going into this build and I had some concerns, but fortunately it hasn’t caused any visual distractions. If anything, I feel like it adds to the modern vibe I was going for, while ultimately providing much necessary acoustic control.
Managing acoustic control for a room is always a unique opportunity. No two rooms are ever alike and my hybrid suite is no exception. The room as an empty shell was extremely live with multi-order standing waves, slap-back, and other common anomalies. Just starting with basic acoustic treatment did WONDERS for this room, calming everything down and directing the sound energy to the back of the room, diffusing it, and terminating it. I even treated my ceilings with panels to ensure the sound waves are pushed to the back of the room. While it’s not a $5M dedicated audio control room, it’s probably one of the best sounding edit/color suites you might sit in.
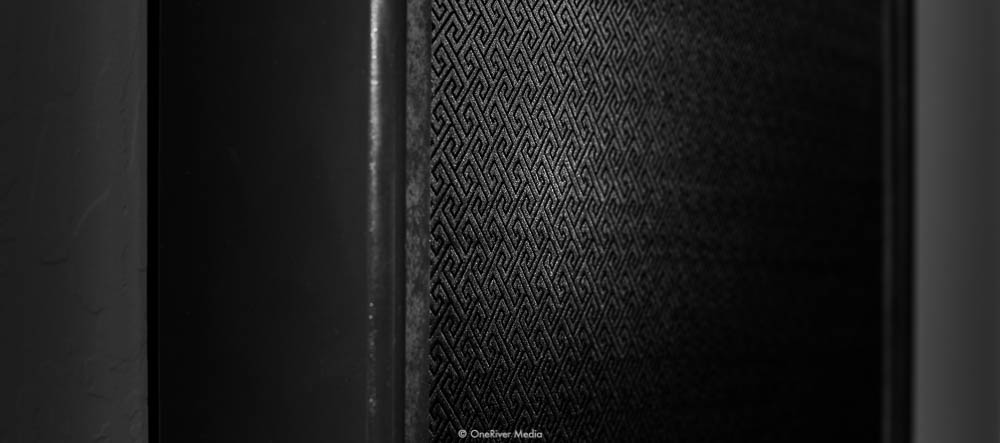
Many years ago I had these custom-made acoustic sound panels made by an independent acoustic panel builder. I picked out the top-layer fabric at a local crafts shop and the builder built it into the panel. There are several layers of acoustic treatment within the panel itself and is about 3.5-inches in total thickness.
I should mention too that the edit desk itself is positioned a fair distance from the front wall, similar in nature to an audio mastering suite. I think some people like to have their edit desk kissing the front wall, but from an audio perspective, I much prefer having some distance while managing 1st order sound reflections (and subsequent orders of reflection) coming from the front. Even pulling your edit desk a mere foot away from the wall (and adding proper acoustic modifications) can create a big improvement in how you’re hearing your audio. My “mix position” in my hybrid suite is middle/center towards the front bias. In total I sit about 8 feet away from the front wall. At any point, I can easily move the console forward or aft if I choose (which I’ve done once already where it’s positioned today).
Toyland
Once the room was sonically and visually controlled, it came time to actually start putting equipment in this digital playground. There are some key components to this so that all the effort in controlling the sound and visuals were worthwhile.At the core center of the visual reference in my hybrid suite is our Flanders Scientific DM240 professional reference monitor. I absolutely LOVE this monitor and it would’ve been a shame (to me) if this monitor lived in an uncontrolled environment. I use this calibrated monitor for visual reference and critical decision-making choices in color grading and finishing. Thanks to the DM240’s multi-input selections, I run native video on SDI channel 1, processed video (from our Blackmagic Teranex 2D — B&H | Amazon) on SDI channel 2, and waveform/vectorscope output from ScopeBox and Ultrascope feeds on the DVI input (more on that in a bit). I can view either full-screen individually or combined as PIP. Our DM240 is the central figure in this hybrid suite.
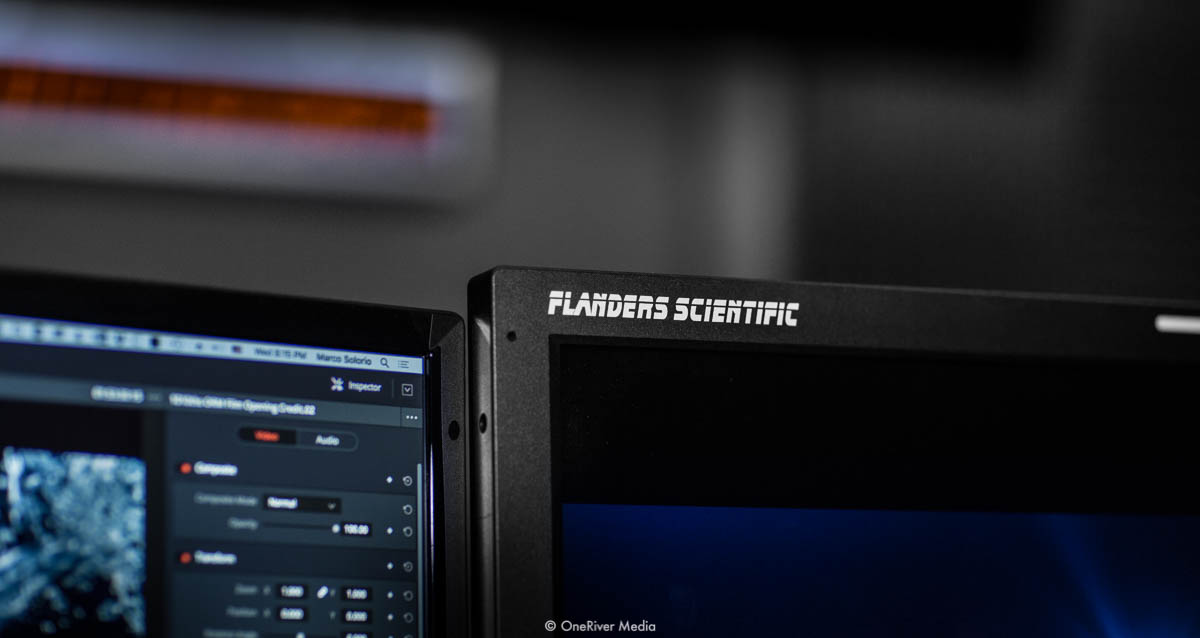
Our Flanders Scientific DM240 professional reference monitor is core to our hybrid suite. Professionally calibrated with industry-leading support, we’ve used FSI for years now with nothing but success.
Hanging on the front wall is our 65” LG C7P OLED HDR 4K UHD client monitor (B&H | Amazon). It’s very easy for clients to watch this monitor (even from the back of the room) and also gives me a reference for what consumers may actually see at home on their TVs (although admittedly this OLED monitor is a bit higher-end than most TV sets consumers have in their home).
My computer monitors are LG 27UD60-B 27-inch 4K UHD IPS displays (B&H | Amazon). The performance out of these monitors have been great, but no color critical work is done through these monitors (a task for the FSI DM240 monitor). They scale really well too if you don’t want to go full 4K native resolution on tiny user interface controls.
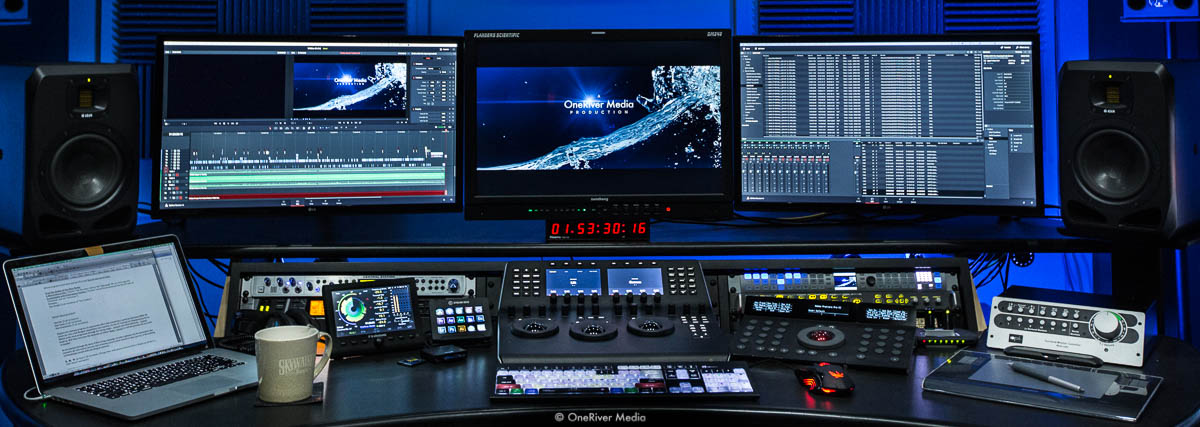
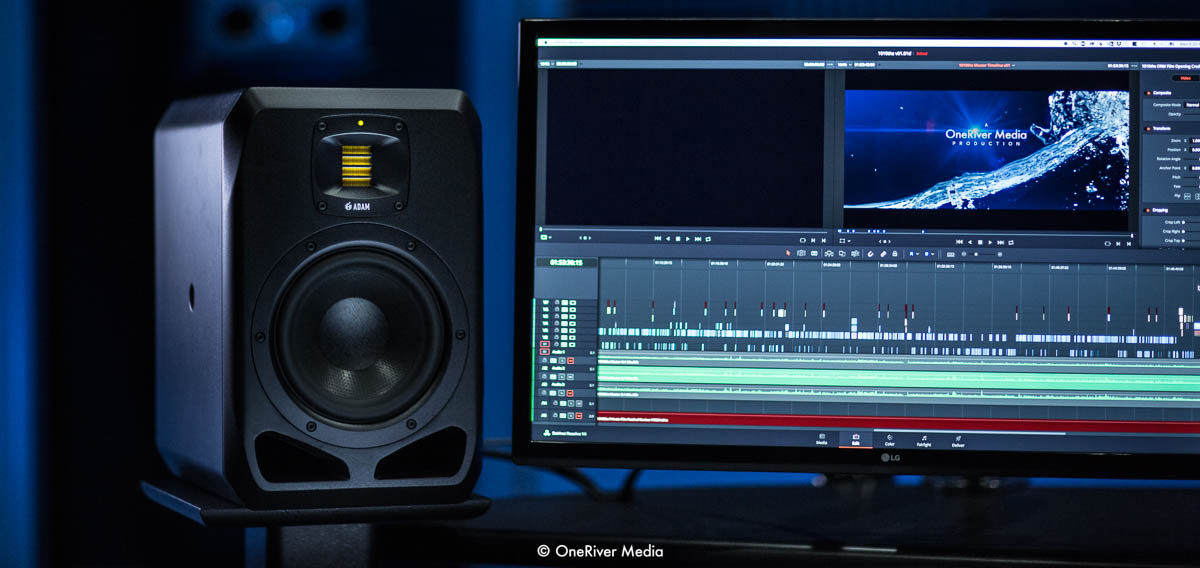
From center outwards on the monitor bridge: Flanders Scientific DM240 reference video monitor, LG 27UD60-B 27″ 16:9 UHD IPS 4K LCD Monitors (B&H | Amazon), ADAM Audio S2V professional studio reference audio monitors (B&H | Amazon).
Critical audio is handled by ADAM Audio professional studio reference monitors. My previous article covers these monitors in great detail, so give that a read for further insight. For a brief overview, the ADAM Audio S2V monitors (B&H | Amazon) are my primary stereo reference monitors, which are completely tunable, thanks to a powerful internal DSP that is controlled via USB and/or the onboard OLED display with push-wheel control. These S series monitors are truly high-end and are ADAM Audio’s top series.
I also use the ADAM Audio T7V monitors (B&H | Amazon), which blow my mind because they are crazy affordable ($500 for the pair) and sound INCREDIBLE. As noted in my previous article, I foresee these T series monitors becoming THE reference audio monitors for video editors and colorists, where affordability is key and high quality is maintained. Seriously, run out now and listen to these in an existing suite or at a store demo.
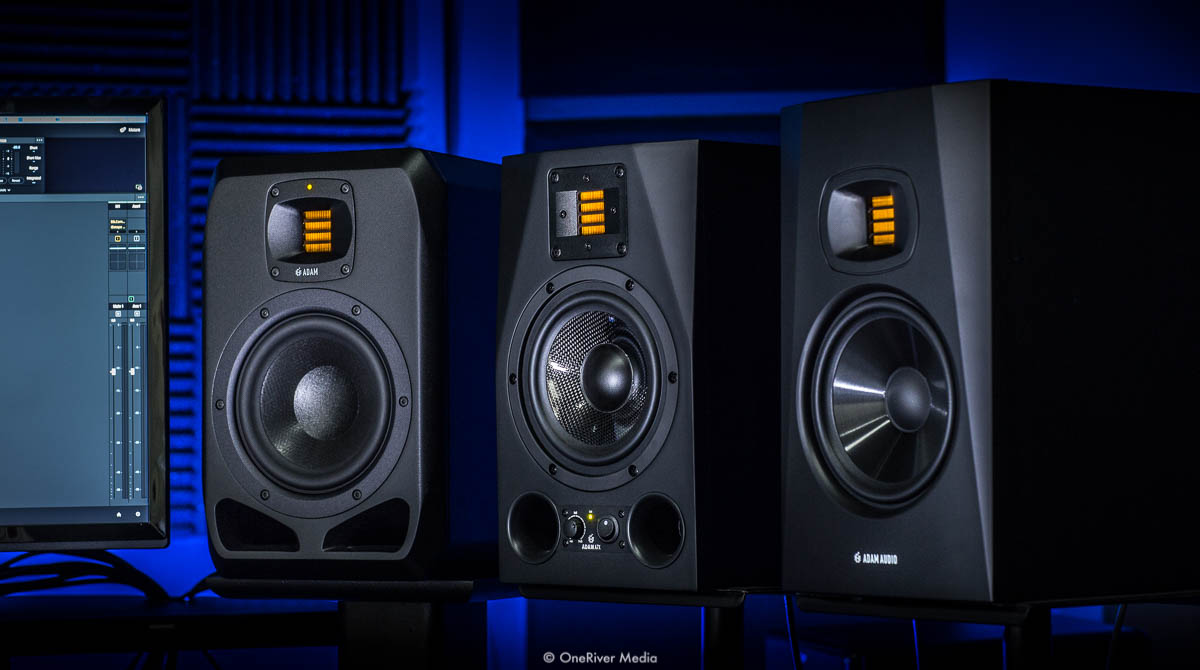
I tested the ADAM Audio S2V, A7X, and T7V professional studio reference monitors four our hybrid suite. My previous article was an entire write-up on these monitors.
Having visual timecode output from the NLE or DAW has always been extremely important to me. It really makes things easier for both the operator and client to instantly reference a point in time or to know the running time as it’s happening. I use a small Horita TCD-100 timecode unit directly under the FSI DM240 monitor and a large ESE timecode unit (B&H | Amazon) directly under the 65-inch LG monitor. As nerdy as it is, having these timecode readers are one of my top favorite features of this hybrid suite (and always has been in my other suites).
The catch though is being able to drive these timecode displays. You will need a solution of de-embedding the timecode from the SDI feed into an analog LTC signal. Without that, these timecode displays are bricks, showing nothing but 00:00:00:00. I use an “old” and bulky (2 rack spaces!) MOTU V4 HD to perform the conversion process. Unfortunately there aren’t any dedicated “black boxes” on the market that solely do this one and only function (it’s typically part of a unit that performs other primary tasks, like SDI to HDMI conversions and such). I’ve tried two Blackmagic Teranex Mini SDI to HDMI converters (which have an LTC output) but neither have worked with my readers. For years I’ve wanted such a dedicated mini black box, but alas, nobody has yet to make one. Please make one, Blackmagic Design!
Primary timecode displays are positioned below the 24-inch Flanders Scientific DM240 monitor and the 65-inch LG monitor, among the six timecode displays that are viewable at any given moment for note-taking.
Mirrored Personalities
As many of you know, I’ve been using Blackmagic Design’s DaVinci Resolve Studio as my primary NLE for almost 3 years as of this writing (with having used it solely for color grading prior to that for a number of additional years). With Blackmagic’s acquisition of Fairlight, the integrated Fairlight DAW in Resolve is now my primary DAW (after 20+ years as a devoted professional ProTools user). And now with Fusion integrated into Resolve, the stakes are even higher as an all-in-one professional software solution for video, audio, and visual effects.Our hybrid suite mirrors this philosophy, integrating video editing, audio mixing, visual effects, color grading, and finishing all in one room, performed by software that also does all this in one package. In a strange way, the hybrid suite is the perfect room to run DaVinci Resolve in. It’s safe to say that DaVinci Resolve is the heart of our hybrid suite. Something I would have never guessed just five years ago.
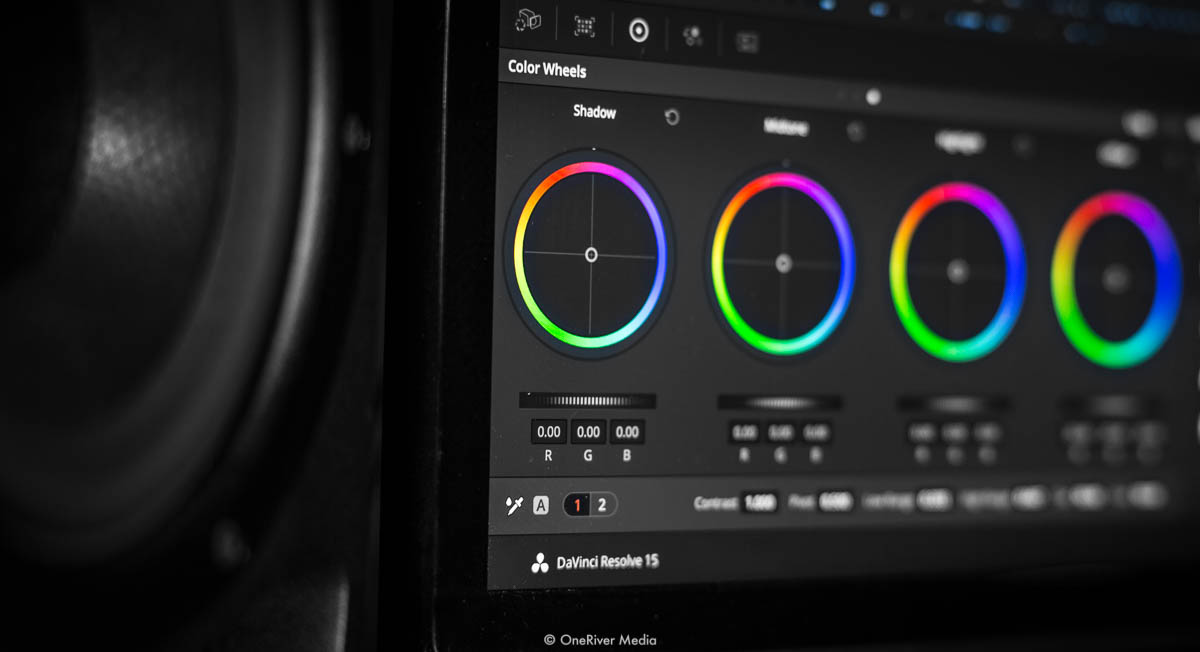
DaVinci Resolve Studio 15 is what truly drives the hybrid suite as an all-in-one solution, with asset management, video editing, visual effects, a digital audio workstation, and encoding/delivery options all within the host application.
Unique Features
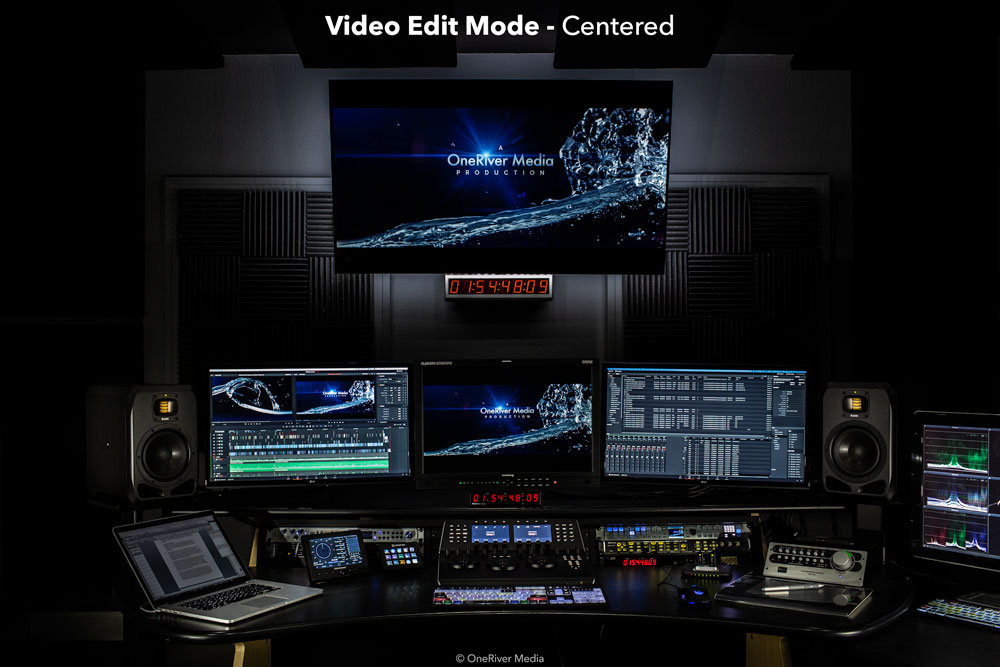
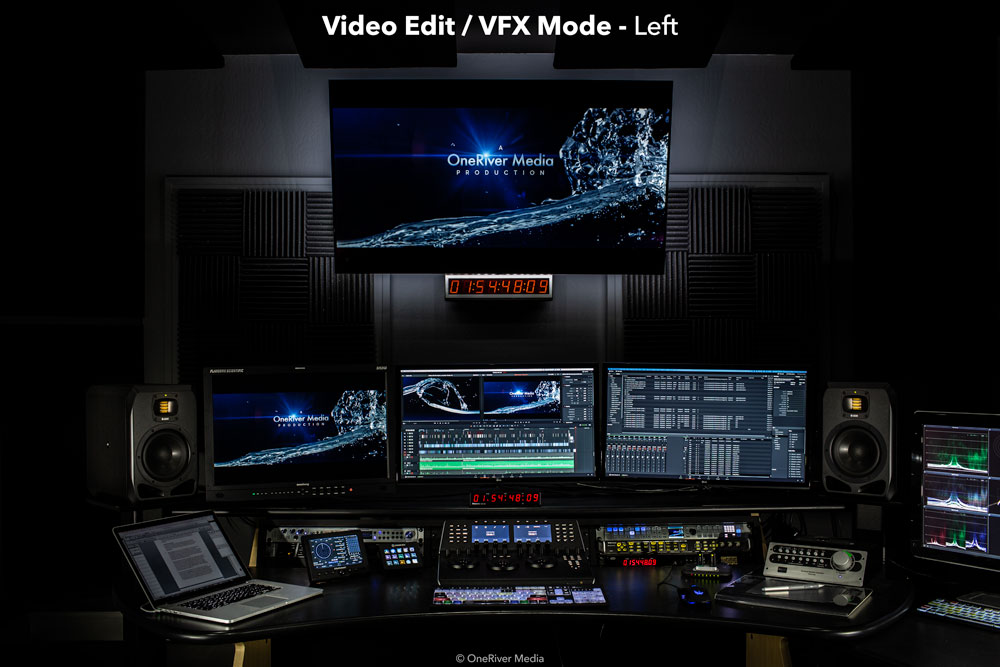
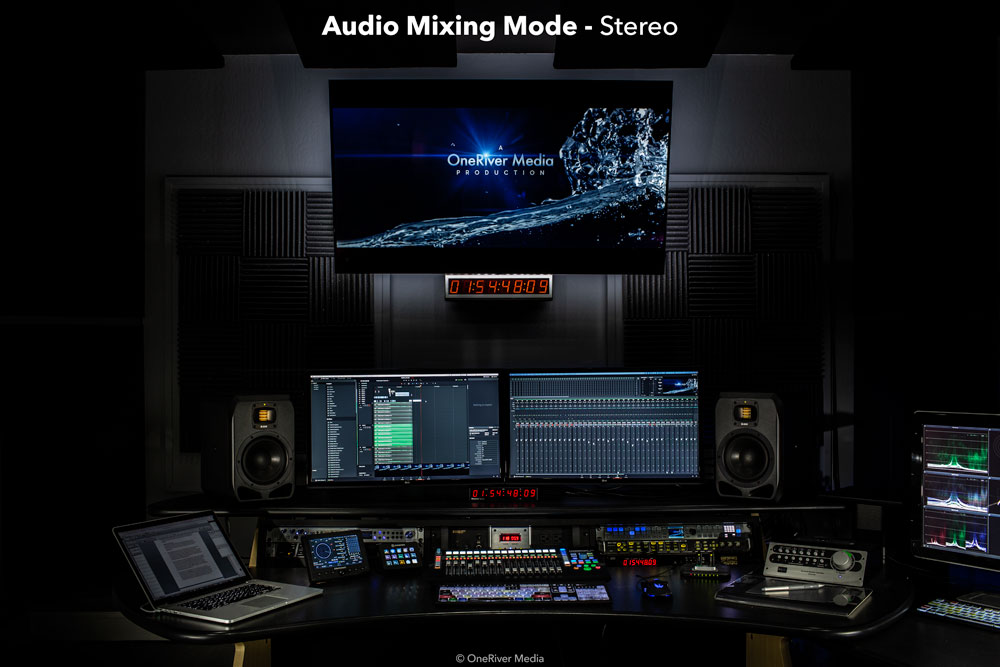
When working in our hybrid suite, I can change between “modes” quickly and with ease. For instance, in color grading mode, I like to have our Flanders Scientific DM240 monitor in the center among the three monitors on the bridge. Having the color critical monitor in the center is a common practice amongst colorist and ensures your focus is squarely on the monitor without any chance of off-axis color shift or neck strain.In video editing mode or visual effects mode, I sometimes swap the DM240 monitor to the right side and the right-most LG interface monitor to the center. This way the interface monitors are now closer to my line of sight, where the color critical need of the DM240 is less important, especially if I’m doing heavy keyframing, compositing, or other non color-critical work. Admittedly however, I’m actually getting so used to the DM240 being in the center of the bridge that even when editing and compositing, I’m ok with the DM240 staying put in the center.
In audio mixing mode, I can place the DM240 at the rear of the monitor bridge (rendering it unused) and place the two LG interface monitors side-by-side, allowing the ADAM Audio S2V audio monitors to sit closer together for a tighter mixing triangle. The 65-inch LG client monitor still allows me to view the video output of picture-sync and because this is entirely a non-critical color reference mode, I do not need to use the DM240 while in “audio mode”.

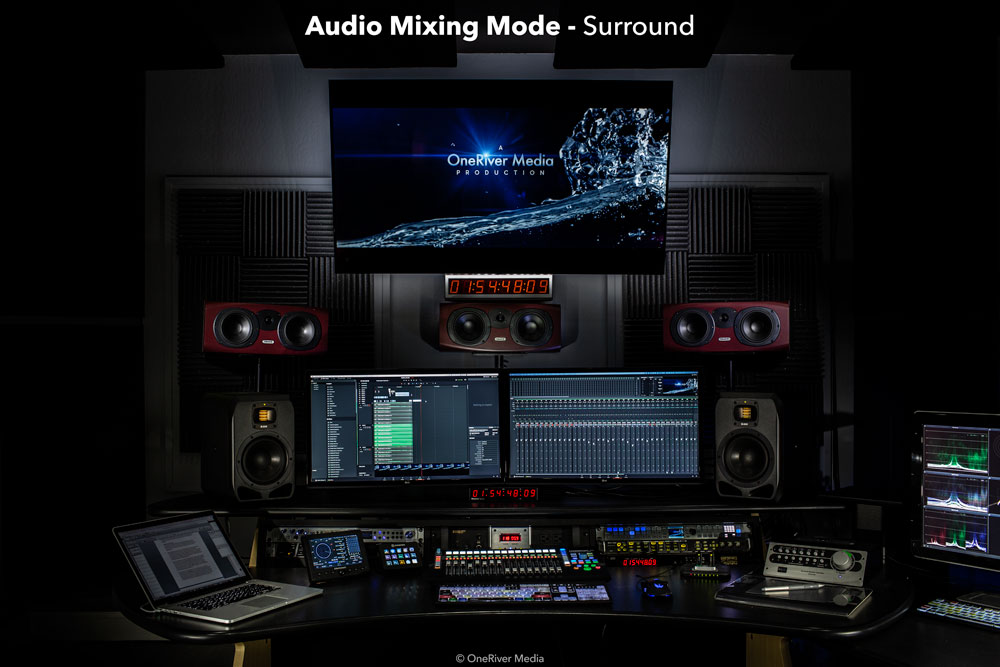
Likewise, if I want to get into an audio vibe, I can turn on my RGB backlights and separate RGB bias light to add mood to the room, because again, visual accuracy/reference is not needed in the “audio mode”. This completely changes the room entirely and feels like I’ve stepped into another suite altogether, keeping things fresh and exciting.
The ability to reposition the floating monitors and swap their placement is accomplished by two things: a high-quality spring tension arm (B&H | Amazon) for each monitor and a set of quick-release VESA mounts (B&H | Amazon). With the right amount of cable slack, you don’t even have to unplug anything if you do it right. Changing monitor positions literally only takes a matter of seconds.
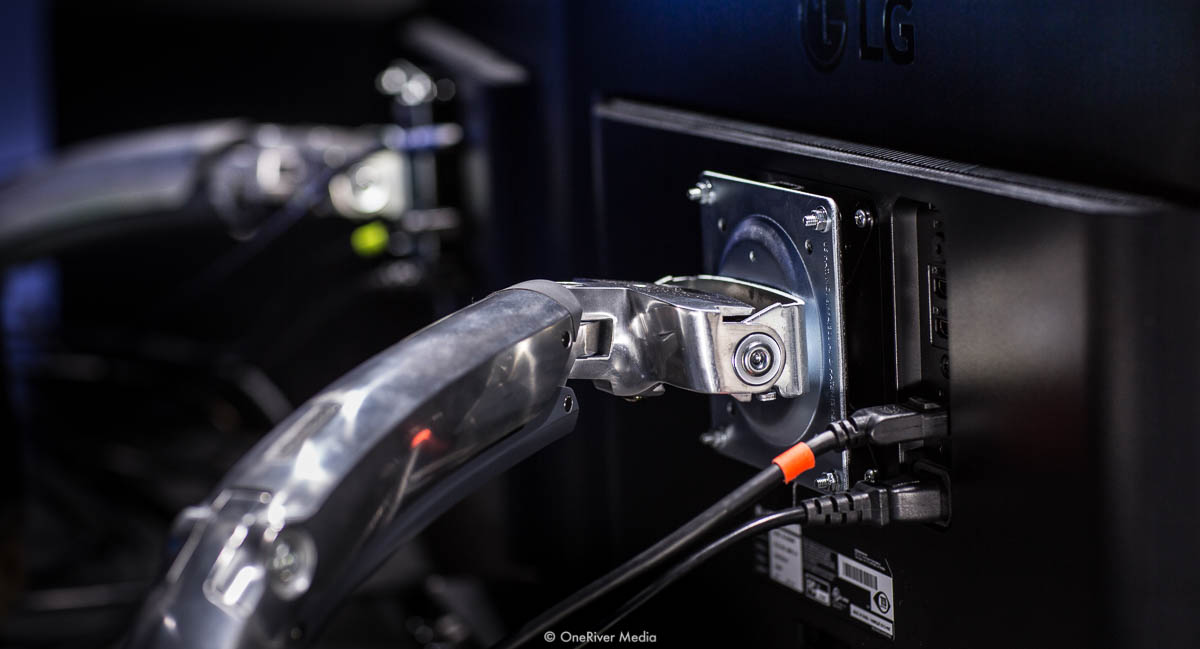
Three adjustable monitor arms (two shown) with quick-release VESA mounts allows the main LCD monitors to be swapped quickly and easily.
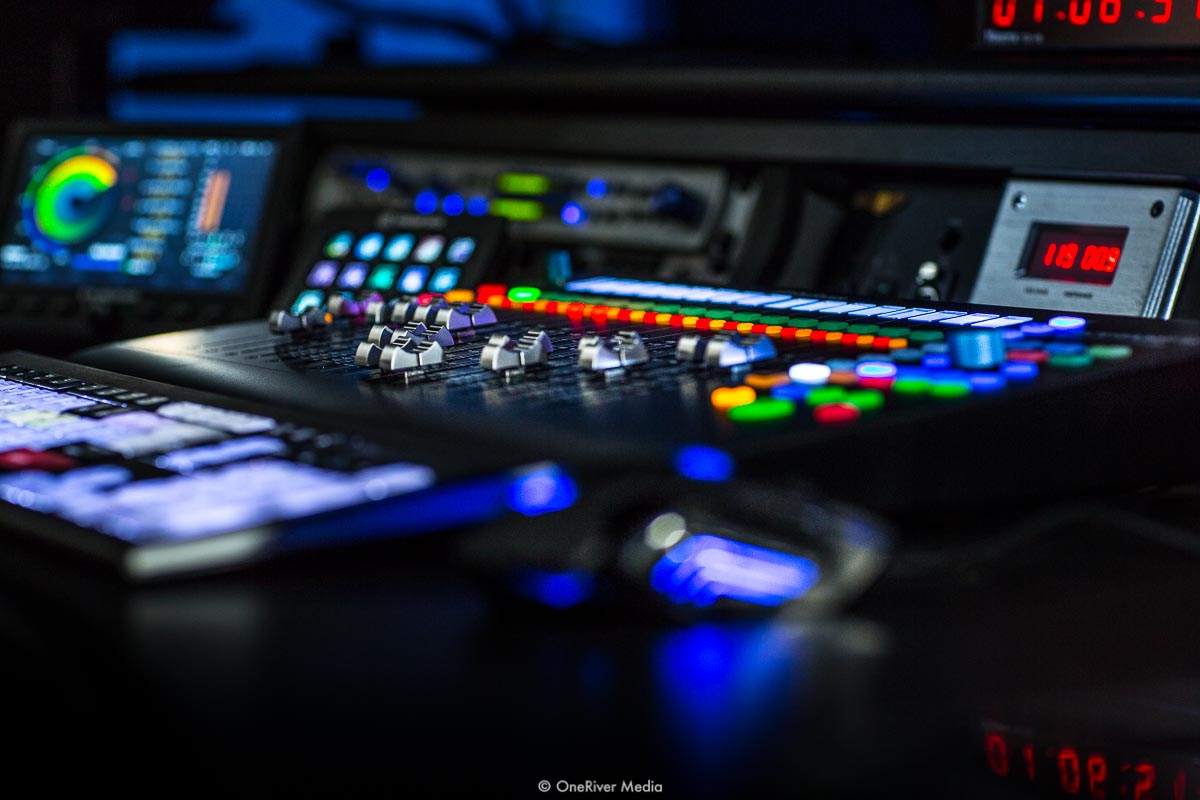
I can swap out control surfaces too, depending on the software I’m using. When using DaVinci Resolve, I have the DaVinci Mini Panel (B&H | Amazon) squarely centered. When working in Fairlight, I can use the PreSonus Faderport 16 control surface (B&H | Amazon), albeit with limited functionality and use of only 8 of 16 channel strips. When working in Adobe Premiere, I can use my Tangent Element panels (B&H | Amazon). Unfortunately AVID Media composer is my only NLE host that cannot utilize any of this control surface hardware since they require purchasing their own tools (boo!), which is due in part as to why I rarely use AVID-anything these days, but I digress. In all scenarios, I implement the Elgato Stream Deck (B&H | Amazon) as a secondary hotkey controller for added hotkey functionality (and now with the ability to run multiple Stream Decks together!). In both the video editing and audio mixing modes, I keep my trusty TC Electronic Clarity M audio meter (B&H | Amazon) close by to ensure my audio levels don’t go crazy at any point.
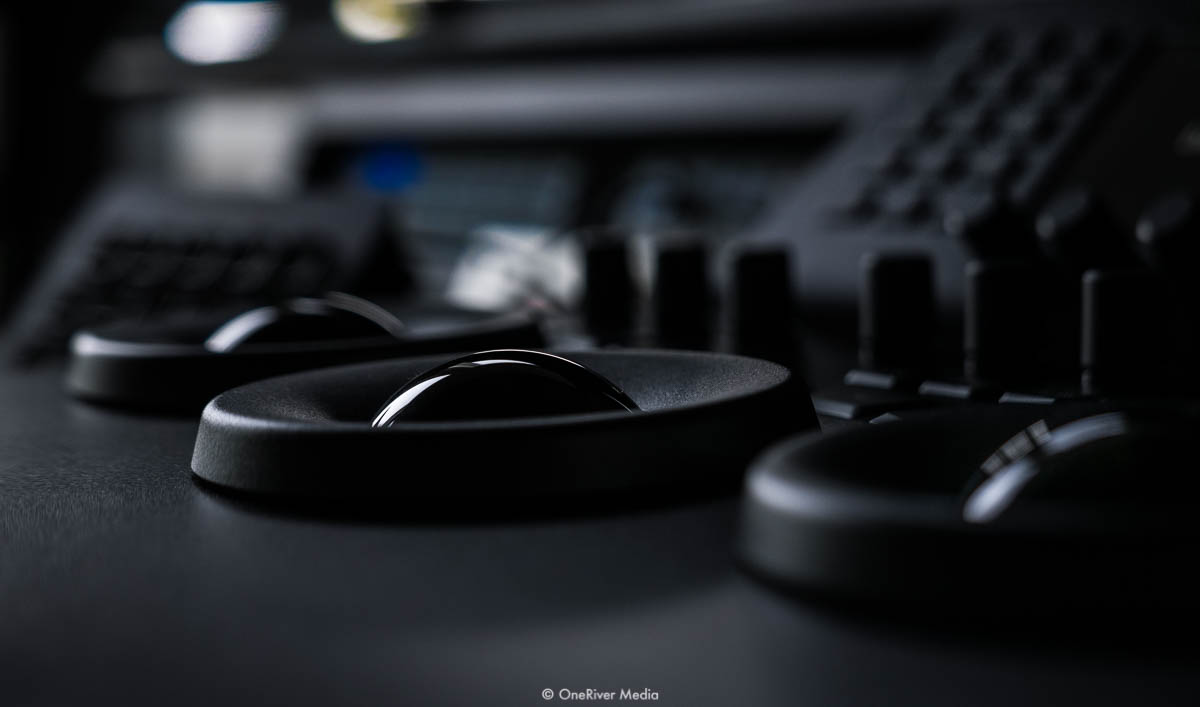
The Blackmagic Design DaVinci Resolve Mini Panel (B&H | Amazon) is a integral piece of hardware that allows us to use DaVinci Resolve Studio quicker and in some cases, with more accuracy and control.
Scoping Things Out
On the color grading side of things, working with scopes is absolutely critical. The hybrid suite is all about modality, flexibility, and adaptability. At the far right of the main desk is a dedicated system for scopes. The scopes can be driven by three units: A rack-mounted Tektronix rasterizer waveform/vectorscope, Blackmagic Design’s Ultrascope (B&H | Amazon) hardware and software system (running on a dedicated HP computer), and Divergent Media’s ScopeBox software (running on a dedicated 2.6GHz Intel Core i5 Dual Core Apple Mac Mini using a thunderbolt Blackmagic Design UltraStudio Mini Recorder for SDI input). Tektronix is the undisputed king of scopes but the unit we have is slightly older (standard SDI but still implements exclusive patented features other scopes cannot have). We’ve currently been pretty pleased with the ScopeBox solution with its feature-set and customizability (while literally saving a five-figure cost against a new Tektronix purchase).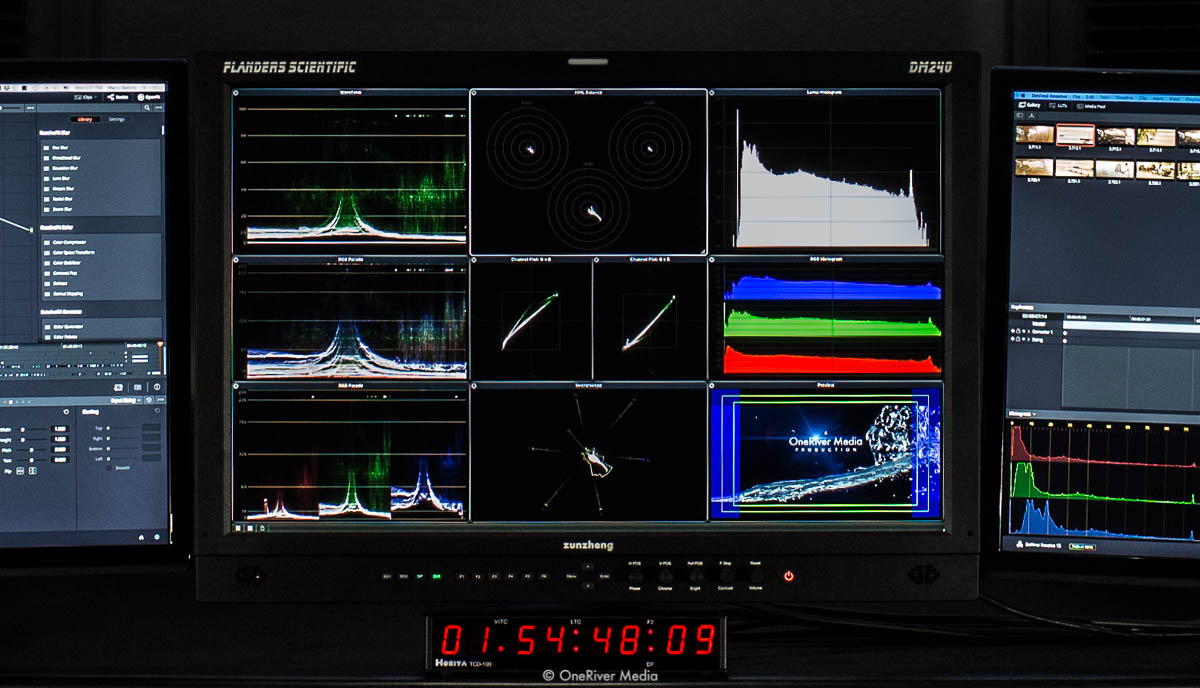
Divergent Media’s ScopeBox is a fantastic cost-effective solution for waveform/vectorscope monitoring compared to our Tektronix alternative.
By default the scopes are displayed to the right of the desk with its own monitor. This is fine when I’m not performing color-critical tasks, like editing, visual effects, or audio work. This allows the main monitors up front to work as a dual monitor setup with color accurate video monitors.
The waveform/vectorscope output is always driven on a dedicated monitor to the far right of the desk and can be assigned/mirrored to any of the other monitors in the hybrid suite. UltraScope (shown) or ScopeBox (preferred) can be selected as the source.
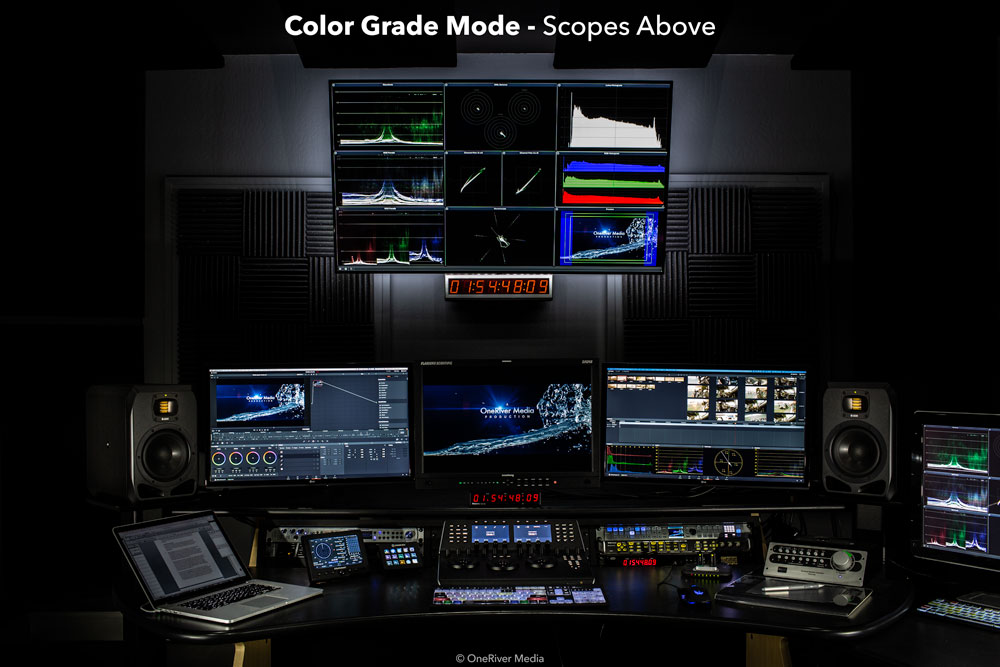
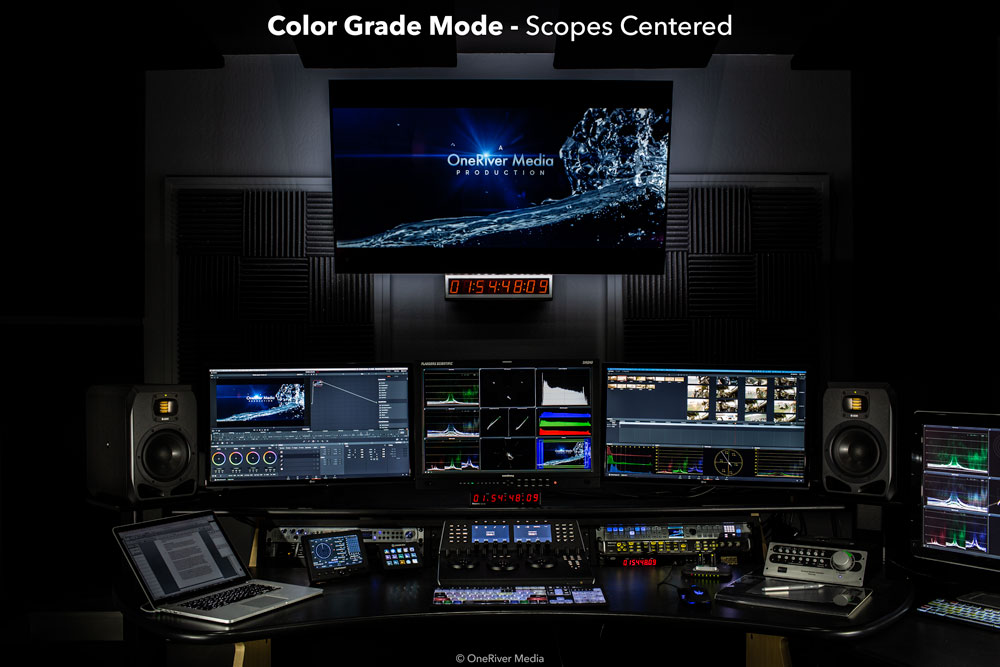
When the hybrid suite is in color-grading mode, I have a couple of options and it all boils down to how I want to use the Flanders Scientific DM240 monitor. If I want to use the DM240 primarily as the color accurate display, I can opt to send the dedicated scopes to either the left or right monitor (losing DaVinci Resolve’s second monitor output and turning Resolve into single-monitor mode) or I can drive the dedicated scopes to the 65” LG display (something I don’t try to do on long sessions because I don’t want to burn in the waveform interface in the sensitive OLED display).
The other alternative is to use the DM240 as the dedicated scope display itself. This puts the scopes squarely in front view, which can be quite helpful sometimes. Because the 65” LG OLED display sits right above, this can be used as a decent reference as well. The nice thing is that I can toggle the DM240 between “video mode” and “scope mode” by simply pushing the input button on the monitor itself, from SDI-1 to DVI. Remember, the dedicated scope setup to the far right of the three main monitors is always active, so even in “video mode” I can still instantly see scopes without changing modes if need be. And there’s always the DM240’s PIP modes where I can PIP either the video source or the source scopes. Lastly, the DM240 also has its own powerful set of scopes that can be handy, especially if you’re on-location on a remote edit/grading system.
The last option is to physically swap the center DM240 monitor with the right LG monitor (using the quick-release mounts) so that the DM240 is always displaying video and the LG monitor (now centered) is always displaying scopes.
The options are vast and give anyone sitting in the captain’s chair the option to work however they see fit to ensure their work time is optimized, efficient, and creatively freeing.
Tips For New Suite Builders
The first thing to ask yourself is where is your suite or workplace situated? Obviously it’s ideal to operate your business that is free of neighbors but that’s not always a possibility. You need to bear in mind that the potential of surrounding neighbors (both directly and indirectly) can cause noise pollution, parking congestion, and other negative impacts. But with enough planning, a little bit of luck, and some conceptual designing, you can situate yourself in a comfortable working environment for many years.You should then decide how you’re going to utilize the workspace. Is it just video editing? Color grading? Visual effects? Audio mixing? Production shooting? Do you need a machine room? A conference room? There are many variables that dictate how a space is designed with the type of work you’ll be doing in it. For example, the design of a dedicated audio control room is completely different than designing a space for a color suite (not that they can’t be combined). Planning ahead is key, especially if you want to combine operations into a single suite, as I’ve done in our hybrid suite.
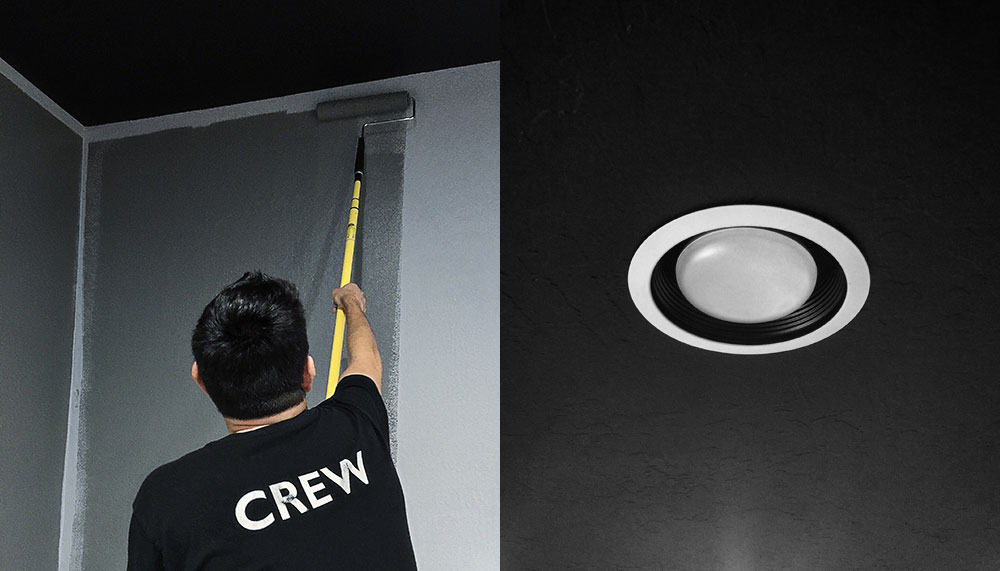
One of the best cost-cutting measures is to do the hard work yourself. Left: me applying N5 paint over a new gray base layer of primer. Right: To save time, I had dimable ceiling pot lights installed and wired by hired professionals, as per my specifications to the electrical contractor.
If you’re moving into a leased office space, there may be options for you to have “TI” (tenant improvements) at no cost to you, depending on the length of your lease and the flexibility of the property owner. Typically they’ll accommodate your needs on a long-term lease because they want to keep you on as a paying tenant for as many years as possible. Back when I leased office space, I commonly had walls rearranged to fit my needs (after much detailed panning on my part) to situate edit rooms, audio control rooms, sound booths, conference rooms, machine rooms, and much more. The good thing about office buildings is that most of them are designed to be rearranged as new tenants come and go. The bad thing about office buildings is that they’re office buildings with other tenants, parking considerations, and a slew of other limitations. While I’m no longer using leased office space as part of my business model, I still see it as a viable option in many business models for others to operate their businesses.
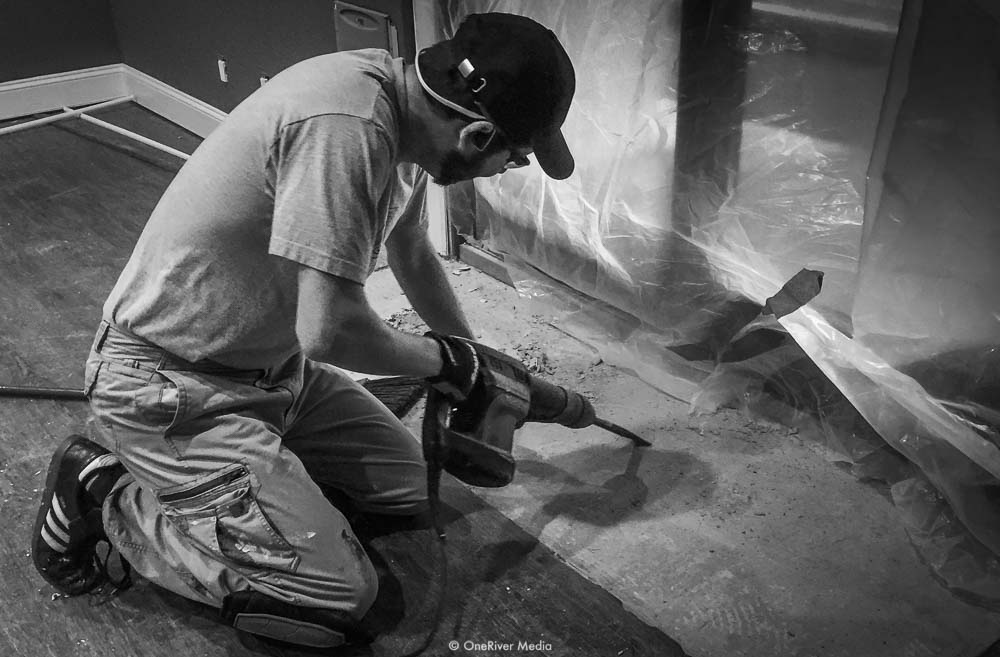
I didn’t particularly enjoy doing my own flooring (including concrete entry slab removal as shown here), but if you can sacrifice the time, doing your own hard work in a suite build-out can save a huge amount of money.
To work from home or to not work from home, that is the question. For this reference of “home” it can refer to an actual house, apartment, farm, whatever, but anywhere you live and conduct business. This home solution works for many people and for many it simply does not. The biggest key factor when working from home is that you really need to have separation from “home life” and “work life”. If you have loud neighbors, crying children, or any other slew of distractions or impediments, then working from home may not be your best solution in the long run. Additionally, if you have new clients that need to sit in a post-production session, it might be a little awkward (at first) to walk through someone’s home to get to the edit/color/mix room (longtime clients typically don’t care about this however). A dedicated entryway to home-based workspace for clients is ideal if you can do it, but obviously this may be an impossibility with some peoples’ home layout. But if you have total control over your home environment, then working from home has many benefits over office space leasing, with the biggest of course being cost savings and not having to commute in traffic.
DYI might be slower but it can save a ton of money. There’s also a stronger sense of satisfaction and pride when personally building out your own suite.
If you’re building a new suite from scratch with an open palette, you might want to consider hard surface floors. They can be anything; hard wood, laminate, vinyl plank, concrete (!). I’m personally not a fan of carpet in any kind of suite (the thicker the worse) mostly because I tend to move around a lot in my chair and carpet of any thickness (even that hard stuff) feels restricting. I like to flow in my suites and hard surface floors keeps the ebb and flow going. Acoustically, hard surface floors can be managed if there’s enough “stuff” in the suite, including acoustic modifiers (as mentioned earlier), your edit desk, monitors, chairs, people, and anything else that breaks up the sound waves against the hard floor. I have two thick, heavy, and dense comfy chairs in the back of our hybrid suite that also acts as a big bass trap and reflection dampener. If your sound still feels too live because of the hard floor, try treating the ceiling with acoustic absorption and I can almost guarantee that will help cure any reflection issues from your floor.
There’s plenty of room in the hybrid suite for clients to be comfortable during long post-production sessions with adjoining access to a dedicated kitchenette and full bathroom.
Ergonomics and physical comfort always play an important role in any work environment and edit/color/audio suites are no different. I like to keep my main display monitors fairly close to me (the old “high-five” rule, where you should be able to high-five your monitor for best distance). I’ve seen some suites where the interface monitors are at least a couple feet away and it looks dreadfully painful to work that way. Also ensure your arms are always supported, either on the desk itself or armrests that meet the desk. Obviously a very good chair helps as well. Feet and back should be correctly positioned, ensuring a long day in the suite will keep you from aching at the end of the day. A licensed physical therapist or reputable chiropractor should be able to help determine the best chair for your needs, especially if you suffer from any kind of back pain.
There’s no shame in starting small and growing into your space. If you can’t afford a professional edit desk for your suite, then get a regular desk and bang out the work. If you can’t spend the dough on N5 or N7 paint for your walls, get regular paint with the purest gray possible. There are a ton of ways to save on cost and working your way into better solutions later on.
However, there are a couple of things I wouldn’t skimp on if you can avoid it. If you’re doing any video editing and especially if you’re doing any amount of color grading, I’d implore you to get a color accurate and calibrated reference display monitor. I’ve been a major fan of Flanders Scientific for many years now and they have everything from entry-level monitors to exotic high-end monitors to suit everyone’s needs. The last thing you want is to work on a project with an inaccurate display, causing a trickle-down effect to your deliverables.
Secondly and as mentioned earlier, I’d highly suggest giving the very affordable ADAM Audio T7V studio monitors (B&H | Amazon) a spin if you can, or the smaller T5V monitors (B&H | Amazon) if you want to save even more money. Or stepping up to the AX series or the high-end S series to really dial in that accurate reference sound. With video editors doing more and more audio work these days, it’s imperative you have accurate reference audio monitors, just as it’s important to have accurate video monitors. As I’ve said many times before (and I’m quoting myself here), “if you’re not serious about your audio, you’re not serious about your video”.
The ADAM Audio SV2 professional studio monitors (B&H | Amazon) are one of the primary technological “puzzle pieces” that makes the hybrid suite a powerful work environment. You can read my full review of these monitors from my previous article.
Future Builds
While I love our new hybrid suite, it’s not the end of the road for me. I’ve actually got plans for future builds that will take things even further in suite design for my needs.Technology and building materials continue to improve with costs for certain aspects of it becoming lower as years go by. It’s absolutely way more affordable to design and integrate a proper suite today than it was ten or twenty years ago. In many cases, building your own pieces to the puzzle is also much more doable today than it ever was before (acoustic panels and diffusors are a good example of that). Ironically, the deprecation of certain tools also helps with today’s lower entry costs (no longer needing grossly expensive tape decks is an example of that, something I’m VERY thankful for).
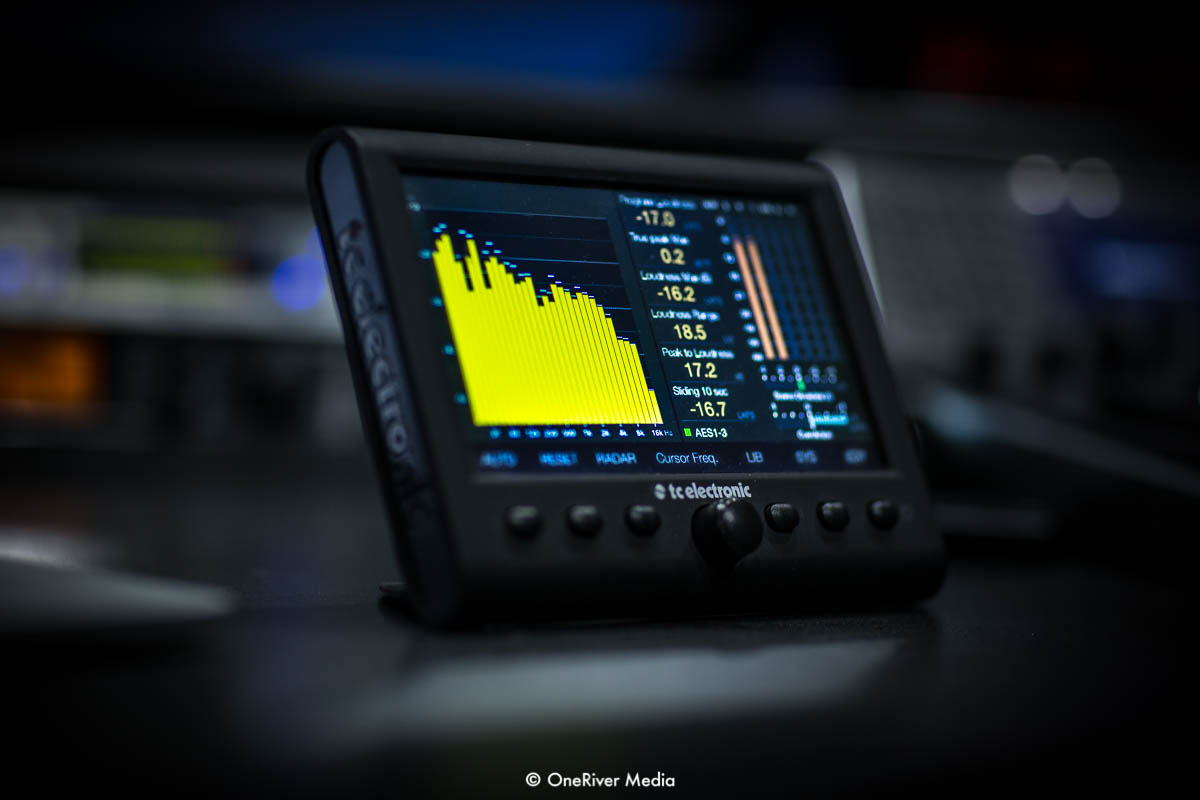
The TC Electronic Clarity M (B&H | Amazon) is one of the essential tools we use at OneRiver Media to help mix audio. It’s especially helpful for surround mixing.
That’s A Wrap
Be mindful of your future (or current) work location and any potential anomalies that could affect the quality of day-to-day operations. If the location is not ideal, it may be a good idea to relocate before you invest time and money in a new suite build.Plan how you’re going to utilize the space and what services will be performed in that space. Just like making a video or film, the more pre-production you do ahead of time, the better your finished piece will be and your suite build-out is no different. Plan, plan, plan, and plan again (this goes for budgeting too).
I used Adobe Illustrator to plan out the hybrid suite in multiple layouts and configuration before ultimately deciding on what is now the permanent installment. I’ve even gone so far as modeling 3D environments in previous suites to see how they’d flow together before physically building out a single piece of materials. It’s easy to rearrange furniture or walls digitally… but in the real world… not so much!
I’ve operated my businesses in countless workspace environments over the decades, from bedrooms, to exclusive several thousand square foot multi-room infrastructures, and everything in-between. I’ve learned a lot over the years and one of the biggest things I’ve learned is that suite design and build-outs change for my needs just as much as the post-production technology itself. There’s no one-size-fits-all solution to designing and integrating your suite, so you’ll have to really hone in on what it is you want to accomplish for your business, yourself, and your clients. But once you figure that out in a budget that works for you, stick to the plan, follow through, and grow into your workspace, adding improvements as affordability and practicality arise.
Modern technology combining various post-production services with balanced workspace makes for an absolutely ideal creative environment for the operator and the clients.
| PRODUCTS MENTIONED IN THIS ARTICLE | ||
| Flanders Scientific DM240 professional reference monitor | Website | |
| LG C7P 65-inch OLED UHD HDR monitor | B&H | Amazon |
| LG 27UD60-B 27-inch 4K UHD IPS display | B&H | Amazon |
| ADAM Audio S2V professional studio reference audio monitors | B&H | Amazon |
Share this post
About the Author
Article © OneRiver Media, including applicable photographs. All rights reserved. Article and its contents shall not be copied or reprinted without the expressed written approval of OneRiver Media.
FCC Disclaimer - Links from this article might go to affiliate links to B&H and/or Amazon (not much different than the ads you see in YouTube ads, but more focused). Visiting these links (or buying products from the links) cost you nothing additional and may in turn help us pay for the cost of hosting these free articles we write. These articles take an enormous amount of time (in most cases, weeks and months) to research, draft, write, edit, rewrite, and shoot custom photography/video for. In no way do these affiliate links cover the cost of all of that, so any help these links can provide is a huge help to us to continue to offer free content to our readers.